How the Appointments Module Works?
The Appointments module helps your team book, manage, and track meetings with leads and clients in one place. It connects the calendar, services, staff schedules, and notifications so everyone knows who is meeting whom and when.
Where to find Appointments in the CRM

In the left menu, click Appointments to open the module.
From here you will usually see:
- Appointments – the main list of all upcoming and past appointments.
- Calendar – a calendar view where you can see and move appointments by day, week, or month.
- Services – list of services you offer (for example “Platform demo”, “Onboarding call”). Usually set up by admins.

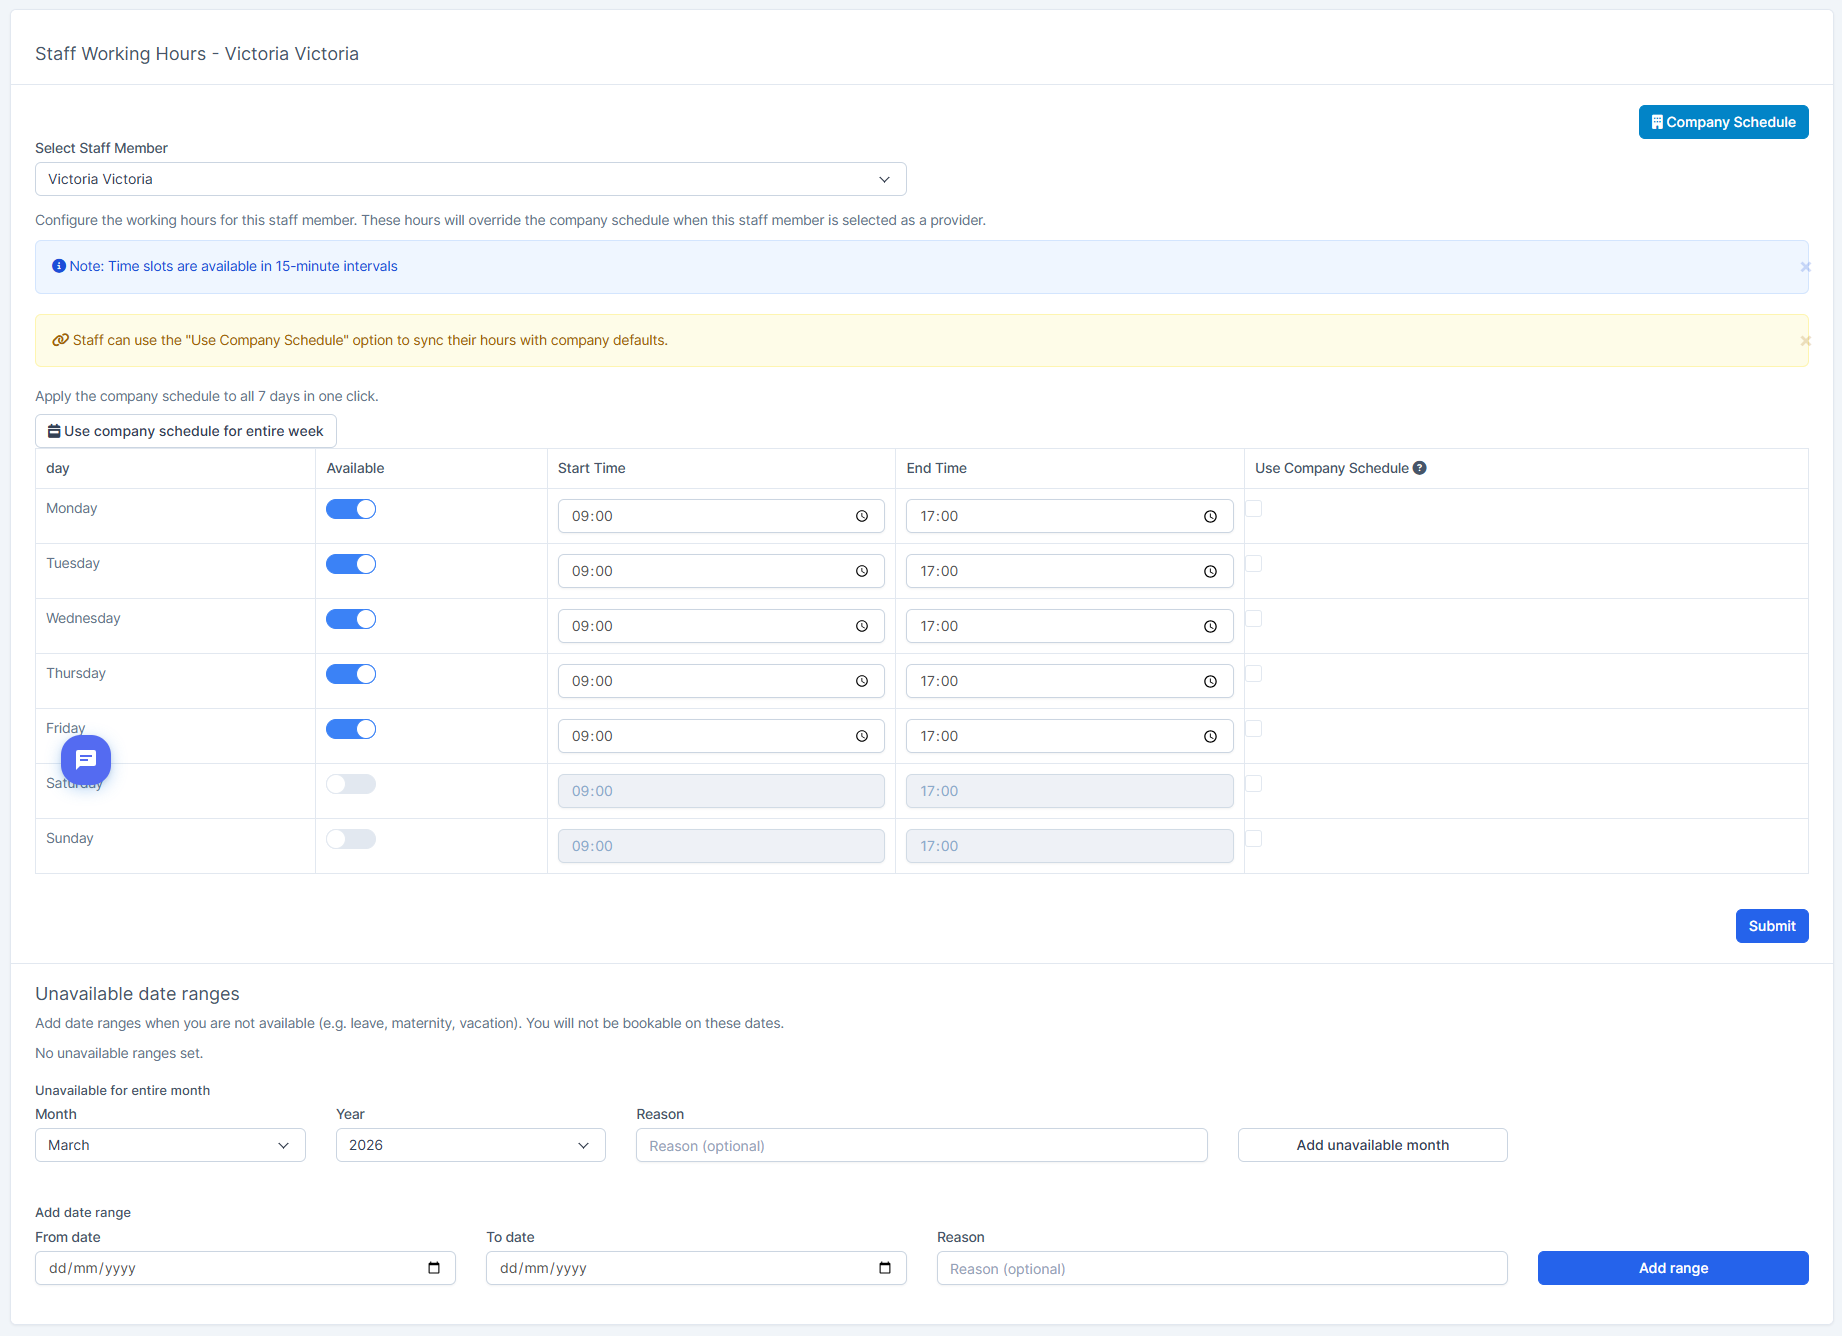
- Company Schedule – general business hours, holidays, and blocked days for the whole company (admin area).

- Staff Working Hours – each staff member’s working time and days off (admin area).
- History – a log of past appointments.
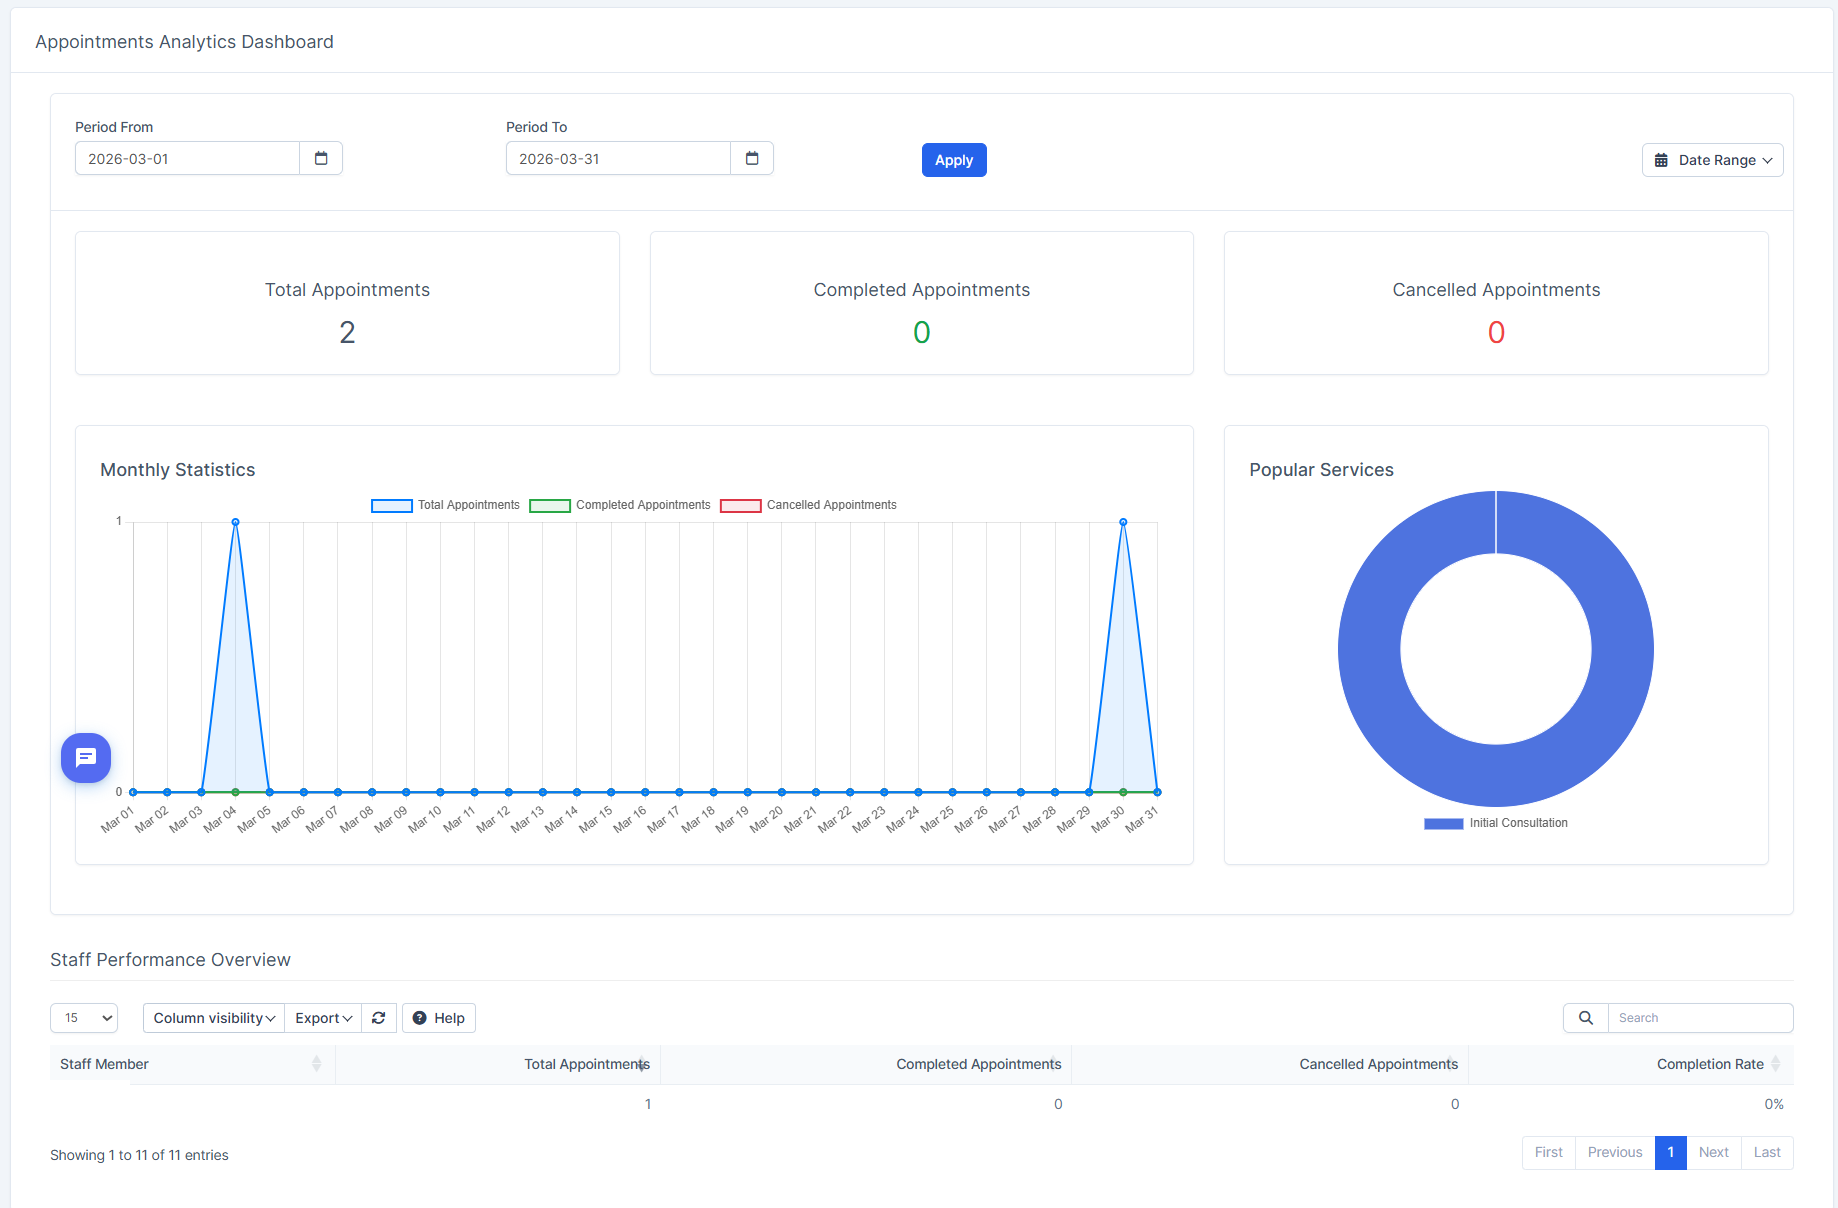
- Reports – statistics on appointments, if enabled for your role.
- Booking Form Link – a public link you can send to clients so they can book their own slot online.
Most regular users will work mainly with Appointments, Calendar, and client profiles.
Basic idea: how appointments are created
Every appointment uses four main pieces of information:
- Service – what the meeting is about (demo, follow‑up, review, etc.). The service usually defines the default duration.
- Date and time – when the meeting will happen.
- Staff member – who will handle the appointment.
- Client or lead – who you are meeting with.
The system automatically checks staff working hours, company schedule, existing bookings, and blocked days to show only available time slots. You do not have to remember who is free – the calendar will prevent double‑booking for you.
How to create an appointment
You can create appointments from the Appointments module, from the calendar, or from a specific lead/client profile.
Method 1 – From the Appointments list
- Go to Appointments > Appointments.
- Click Create New Appointment (or similar “New” button).
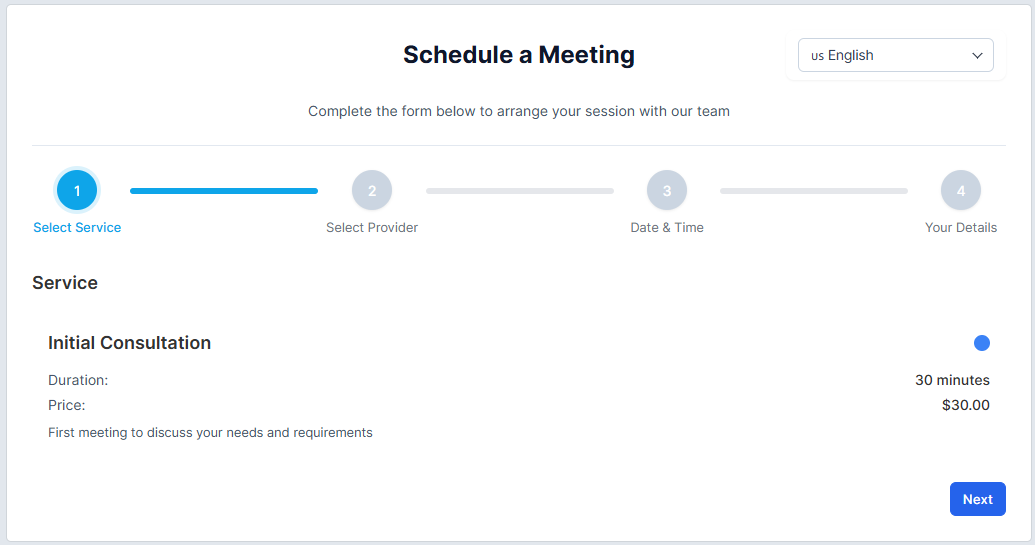
- Select the Service.
- Choose Date and Time – pick from available slots.
- Select Staff – the person who will host the meeting.
- Choose the Client or Lead: search existing or create a new one with name, email, and phone.
- (Optional) Add subject, notes, and location (office, online, phone, etc.).
- (Optional) Enable email/SMS notifications if your system supports them.
- Click Save.
The appointment will now appear in the list and on the calendar for all relevant staff.
Method 2 – From the Calendar
- Open the Calendar view in the Appointments module.
- Click directly on the desired date and time slot.
- A quick form opens with date and time pre‑selected.
- Choose the service, staff, and client.
- Add any notes and save.
This method is useful if you prefer visual planning and want to see the daily or weekly workload.
Method 3 – From a client or lead profile
- Open a Lead or Customer profile.
- Go to the Appointments tab.
- Click New Appointment.
- Fill in the service, time, staff, and notes.
- Save.
The appointment will be linked to that person and visible both in their profile and in the general Appointments list.
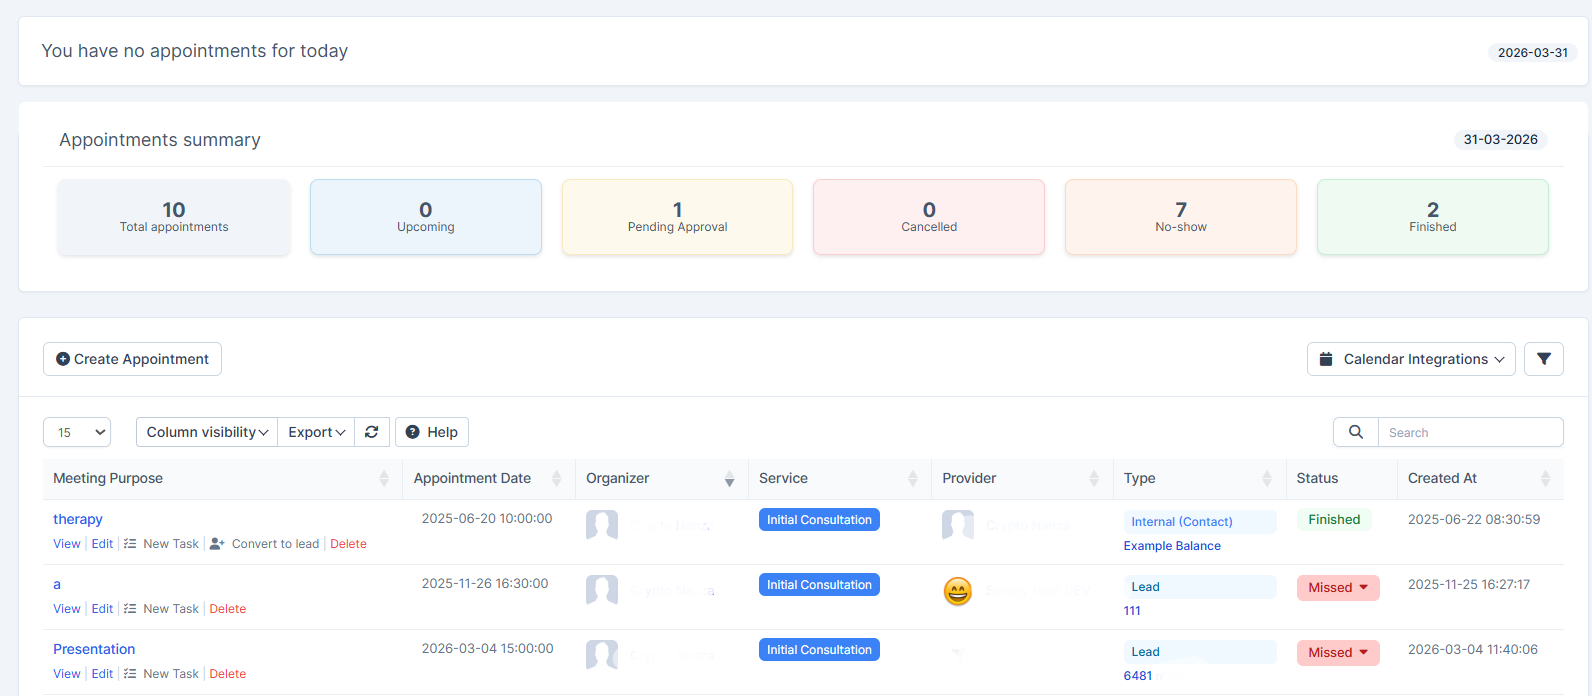
Appointment statuses (what they mean)
Every appointment has a status so you can quickly understand its stage.
Typical statuses:
- Pending – appointment requested and waiting for approval.
- Approved / Confirmed – appointment is confirmed and visible on the calendar.
- In Progress – meeting is happening now.
- Completed – meeting finished successfully.
- Cancelled – meeting was cancelled (reason can be added).
- No Show – client did not attend.
How to change status
You can update the status from:
- The Appointments list – use the status dropdown next to the appointment.
- The appointment details screen – open the appointment and use the status button or dropdown, then save.
Keeping statuses updated helps your reports and makes it easier to see today’s real workload.
Editing, cancelling and deleting appointments
View and edit an appointment
- Open Appointments or the Calendar.
- Click the appointment you need.
- On the details screen you can see service, time, client, staff, notes and history.
- Click Edit to change date/time, staff, client, service or notes.
- Save your changes – the system can send update emails to the client and staff if configured.
Cancel an appointment
Use Cancel when the meeting will not happen but you still want to keep a record.
- Open the appointment.
- Click Cancel.
- Choose a reason (for example: client requested, staff unavailable, rescheduled, no show, other).
- Add optional notes and confirm.
The time slot becomes available again and the client/staff can receive a cancellation notification.
Delete an appointment
Delete is for test or incorrect records; it removes the entry completely.
Use Delete only when:
Do not delete completed, cancelled, or no‑show appointments because you lose history and statistics; use the appropriate status instead.
Working with the calendar
The calendar view helps you understand your day, week, or month at a glance.
Calendar views
You can usually switch between:
- Month view – see which days are busy or free.
- Week view – detailed overview for planning the week.
- Day view – full schedule for one day, useful for daily planning.
- List view – a table of appointments you can sort and filter.
Useful calendar features
- Color‑coded services – each service can have a color, so you quickly see what type of meetings you have.
- Hover tooltips – when you hover an appointment you can see key details such as client, service, duration, and status.
- Drag & drop rescheduling – you can grab an appointment and drag it to another slot; the system checks availability and can send updates automatically.
Using filters and search
When you have many appointments, filters and search keep everything clear.
Quick filters
In the Appointments list or calendar you can usually filter by:
- Status – see only Pending, Approved, Cancelled, etc.
- Service – focus on a particular service type.
- Staff – see only appointments for one specific team member.
- Date range – today, this week, this month, or a custom period.
- Client/Lead – show appointments for one person.
Apply filters to narrow the list; clear filters to go back to seeing everything.
Search
Use the search box to find appointments by:
The search is flexible and usually supports partial matches, so typing part of a name is enough.
Appointments with leads vs customers
You can book appointments for both leads and existing customers.
- When you choose Lead in the appointment, the system links the meeting to that lead profile.
- If the lead converts to a customer later, its appointments stay linked and the history is preserved.
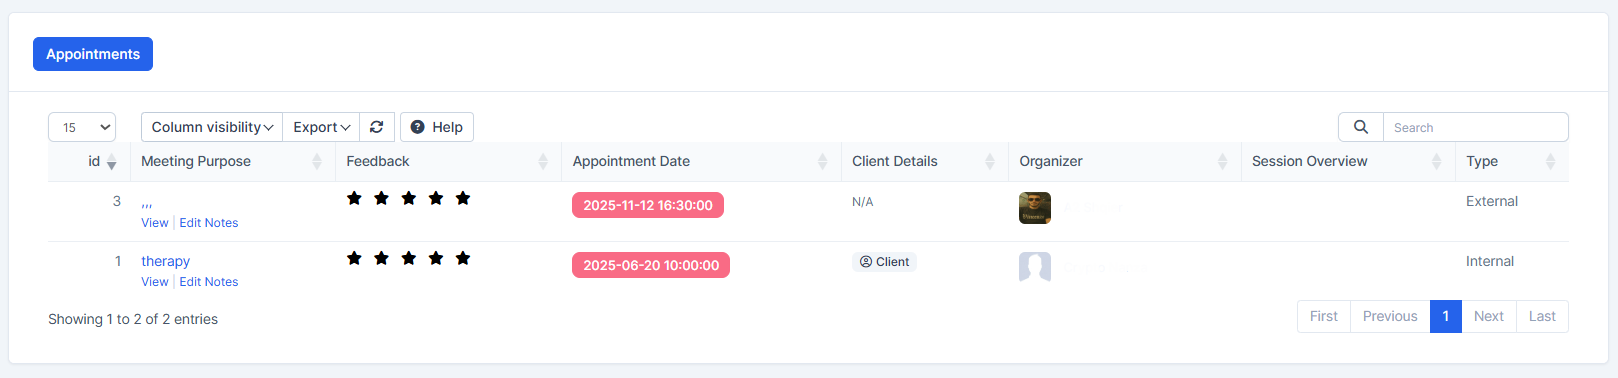
- In both lead and customer profiles you will find an Appointments tab that shows all past and upcoming meetings with that person.
This makes it easy to see the full communication and meeting history before you call or email someone.
Notifications and reminders (if enabled)
The module can send automatic notifications for you; exact behavior depends on how your CRM is set up.
Typically:
- Clients can receive emails (and SMS if configured) when an appointment is created, approved, changed, or cancelled, and a reminder before the meeting.
- Staff can receive notifications when they are assigned to an appointment, the time changes, or the meeting is cancelled.
You usually choose whether to send these notifications when creating or editing the appointment.
Recurring appointments (repeating meetings)
For regular meetings (weekly check‑ins, monthly reviews), you can create a recurring series.
When creating an appointment:
- Enable the Recurring or Repeat option.
- Choose how often it repeats (daily, weekly, bi‑weekly, monthly, etc.).
- Set how long it should repeat (number of occurrences or an end date).
Later you can:
- Edit just one date in the series.
- Update the entire series (for example change time).
- Cancel remaining future appointments.
The system automatically creates upcoming appointments based on your pattern so you do not need to book each one manually.
Integration with calendars and time zones (if available)
If your CRM is connected to Google or Outlook calendar, appointments can sync automatically.
Typical behavior:
- New appointments create events in your external calendar.
- Updates and cancellations are reflected in both directions.
- Video links (like Google Meet) can be added and included in emails.
For teams in different time zones, you can set the client’s time zone while the staff sees their local time. The system converts times so both sides see the correct hour.
Daily workflow example for an agent
A simple recommended routine:
- Start of day – open Appointments or Calendar, check today’s schedule and pending bookings.
- Confirm all important meetings are Approved/Confirmed.
- Before each call – open the client or lead profile, read notes, and prepare.
- Immediately after each meeting – open the appointment, add notes, and change the status to Completed, Cancelled, or No Show.
- At the end of the day – review tomorrow’s schedule and send any needed follow‑up or reschedule messages.
Quick checklists
You can keep these as short internal checklists.
When creating an appointment
- Service selected
- Date and time available
- Staff assigned
- Client/lead selected or created
- Notes and location added
- Notifications enabled (if needed)
- Appointment saved
Before the meeting
- Contact details checked
- Time confirmed with the client (if needed)
- Meeting link or address shared
- Previous notes reviewed
After the meeting
- Status updated to Completed/Cancelled/No Show
- Notes added
Keyboard Shortcuts
Ctrl/Cmd + N - Create new appointment
Ctrl/Cmd + F - Focus search box
Ctrl/Cmd + S - Save appointment
Esc - Close modal/dialog
Arrow Keys - Navigate calendar
Enter - Open selected appointment
Follow‑up scheduled if needed