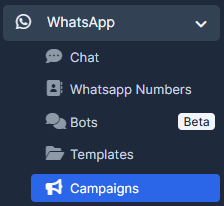
What the WhatsApp module is
The WhatsApp module connects your WhatsApp numbers to the CRM so you can chat without using your phone.
All incoming and outgoing messages are stored in the client's profile, so any agent can see the full chat history.
You can use ready message templates, quick replies, and campaigns to reply faster and reach more clients.
Where to find WhatsApp in the CRM
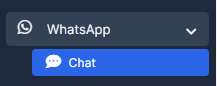
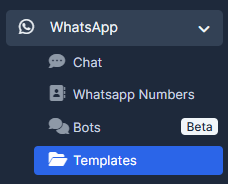
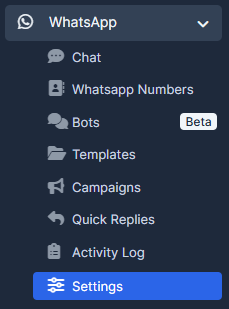
In the left menu, click WhatsApp and then click Chat to open the main chat screen.
From this screen you see all chats, filter them, and open any conversation in one click.
At the top of the chat list you will find filters by chat type, status, staff, and activity.
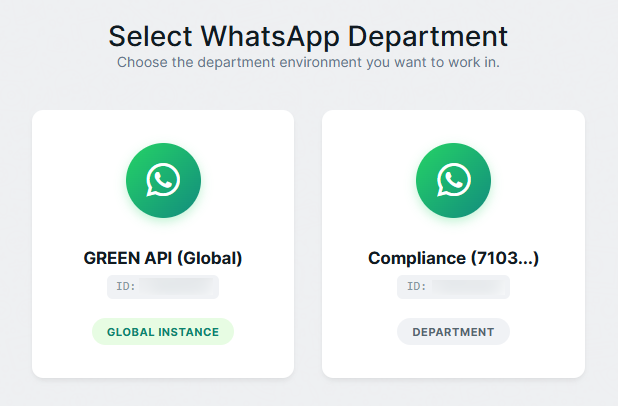
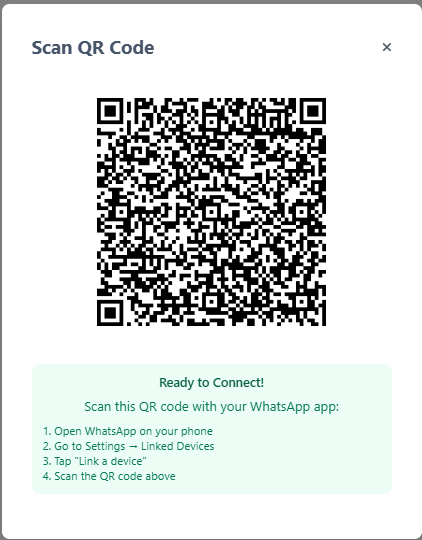
To start, select a model and Scan QR Code with your actual WhatsApp account.
Understanding the chat screen
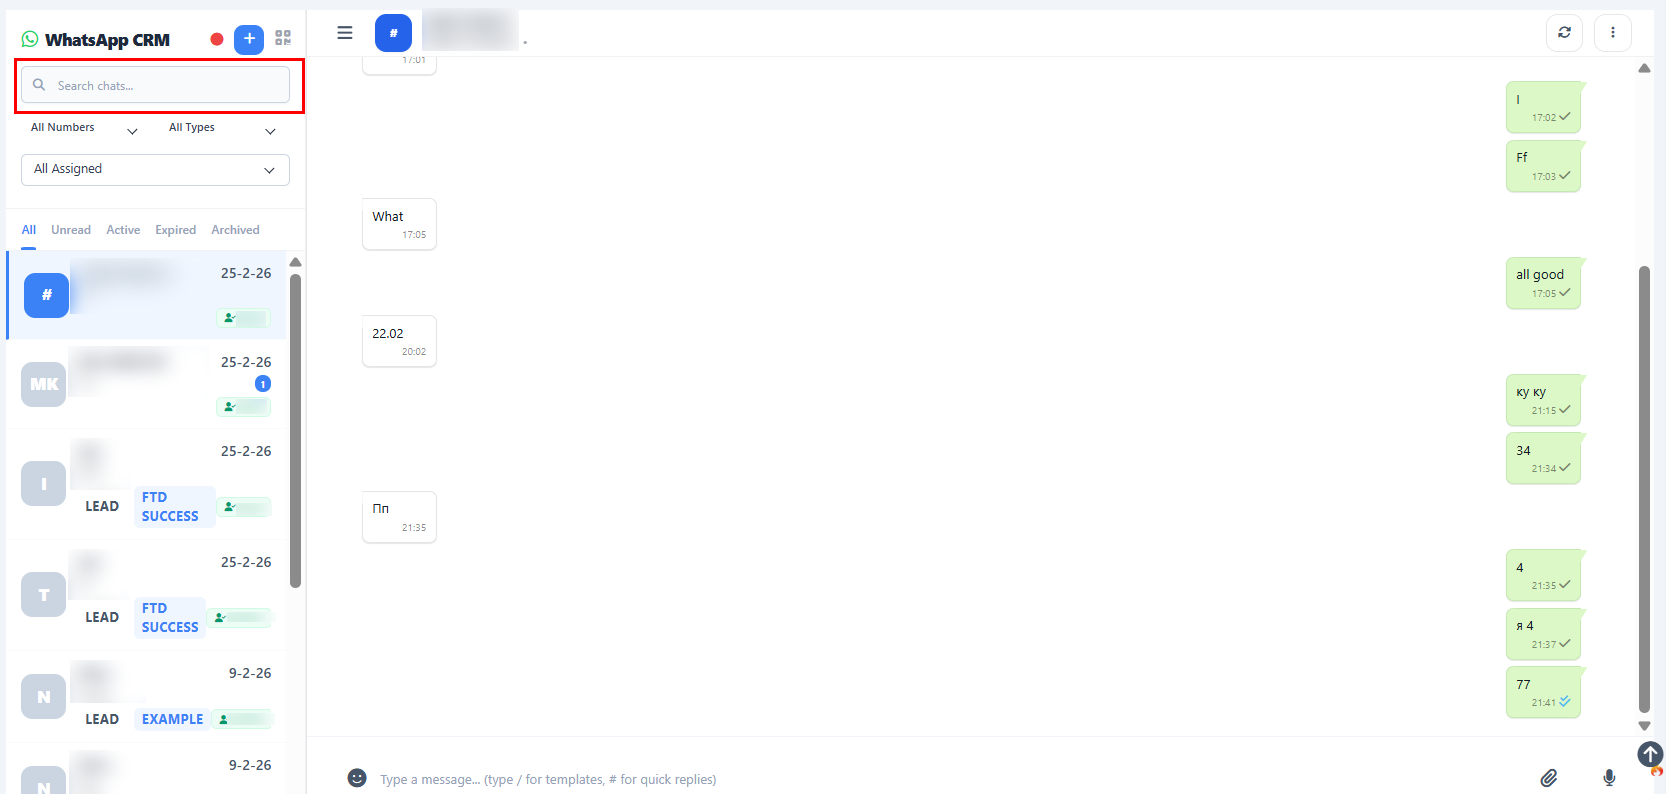
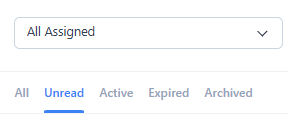
On the left side you see the list of chats with a search box and filters (for example: All Chats, All Types, All Statuses, All Staff, Active/Unread/Expired Chats).
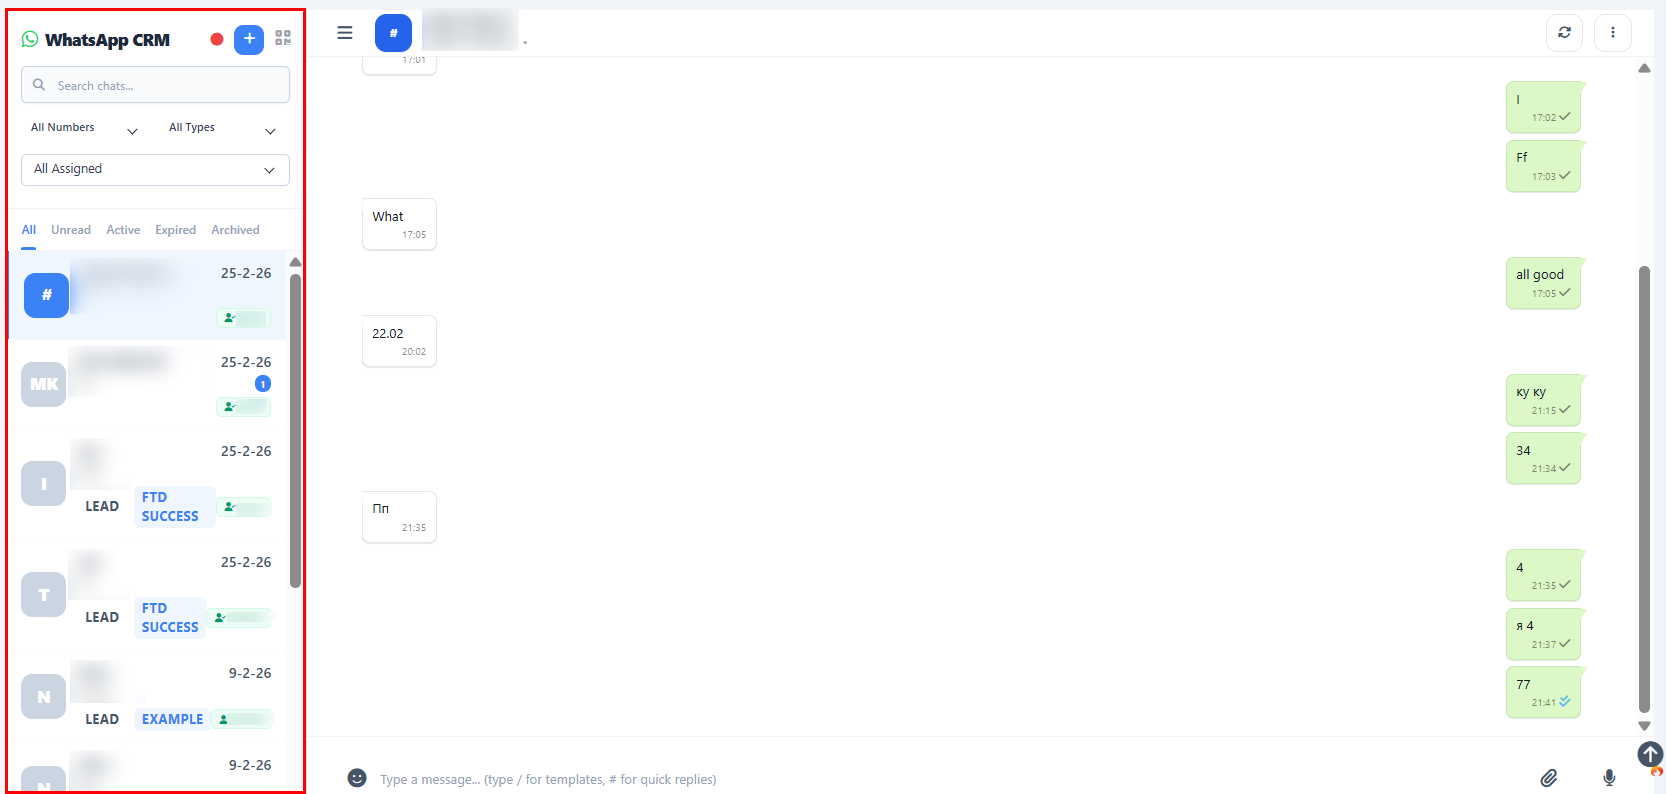
In the middle you see the selected conversation: client messages and your replies in a familiar messenger style.
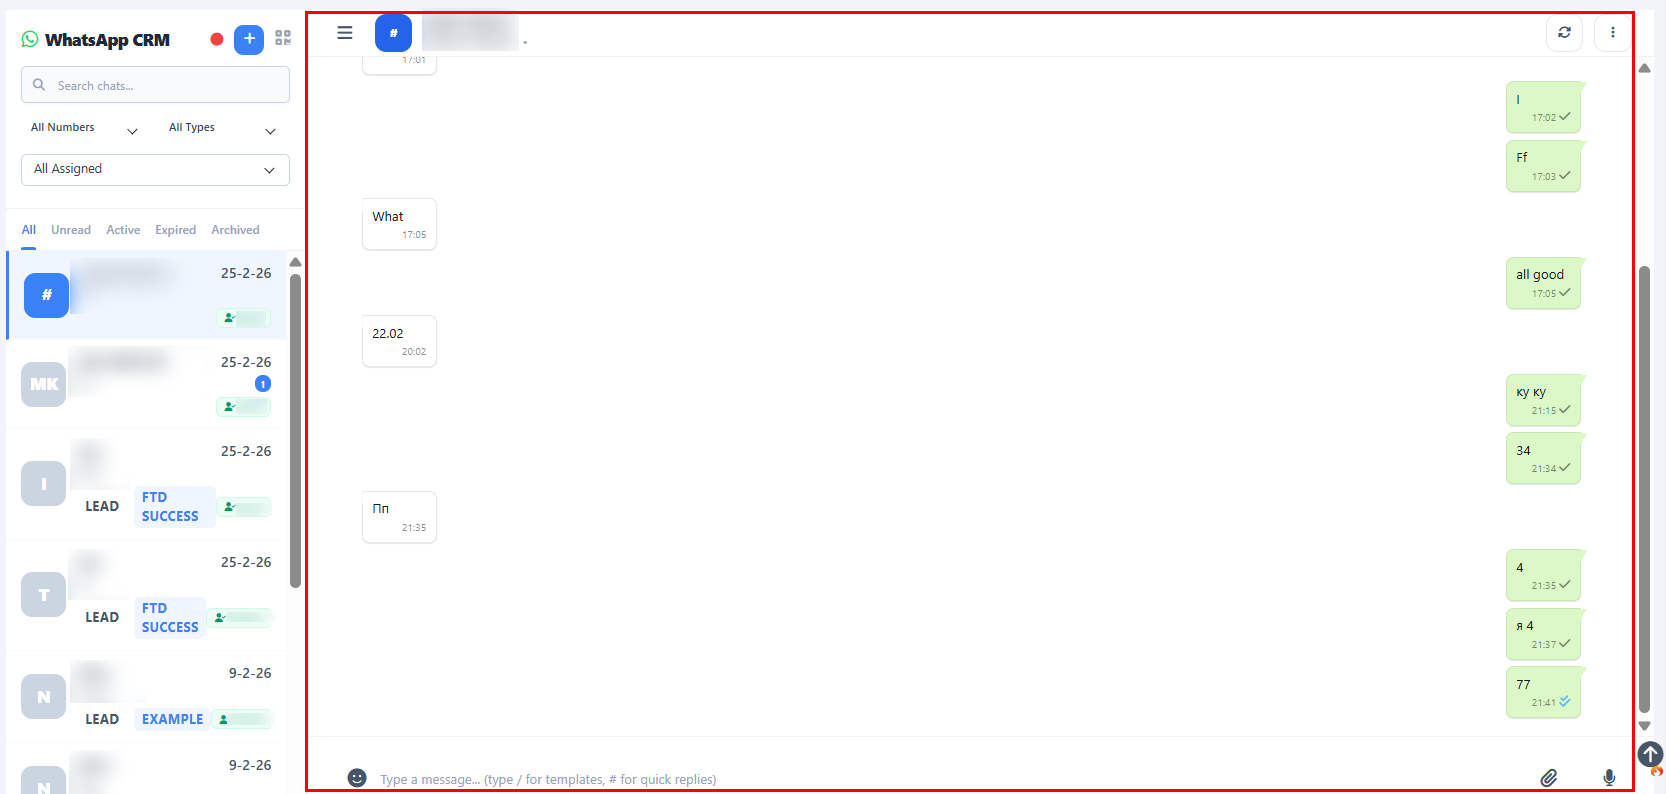
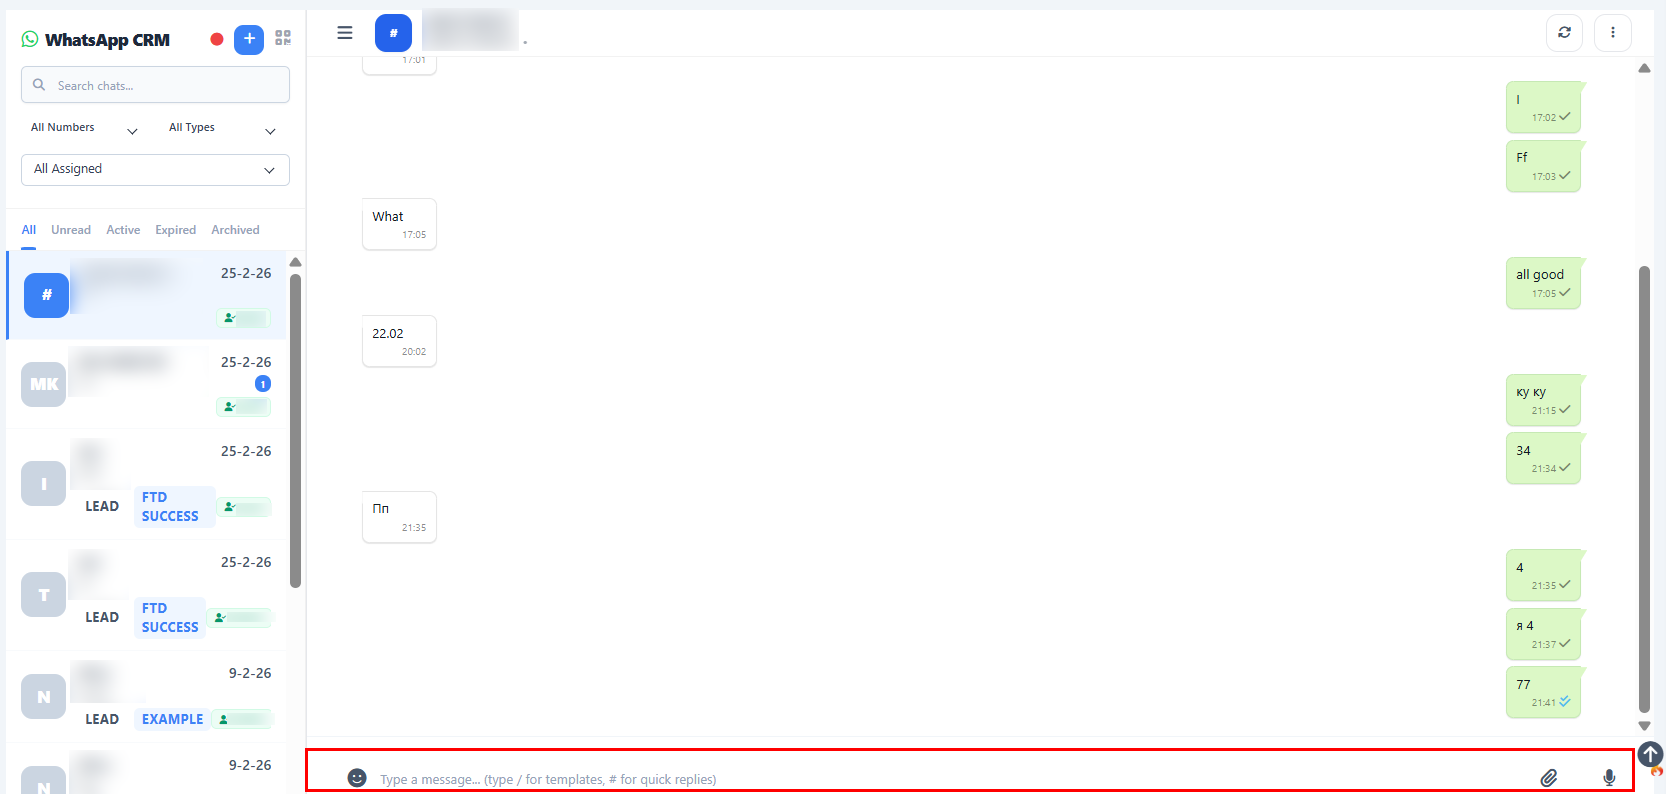
At the bottom you have the message box to type your reply, attach files, and send the message to the client.
How to start or continue a chat
To continue a chat, click on any contact from the chat list, type your message in the "Type your message…" field, and press Enter.
To find a specific person, use "Search chats…" above the list and type a name, phone number, or keyword.
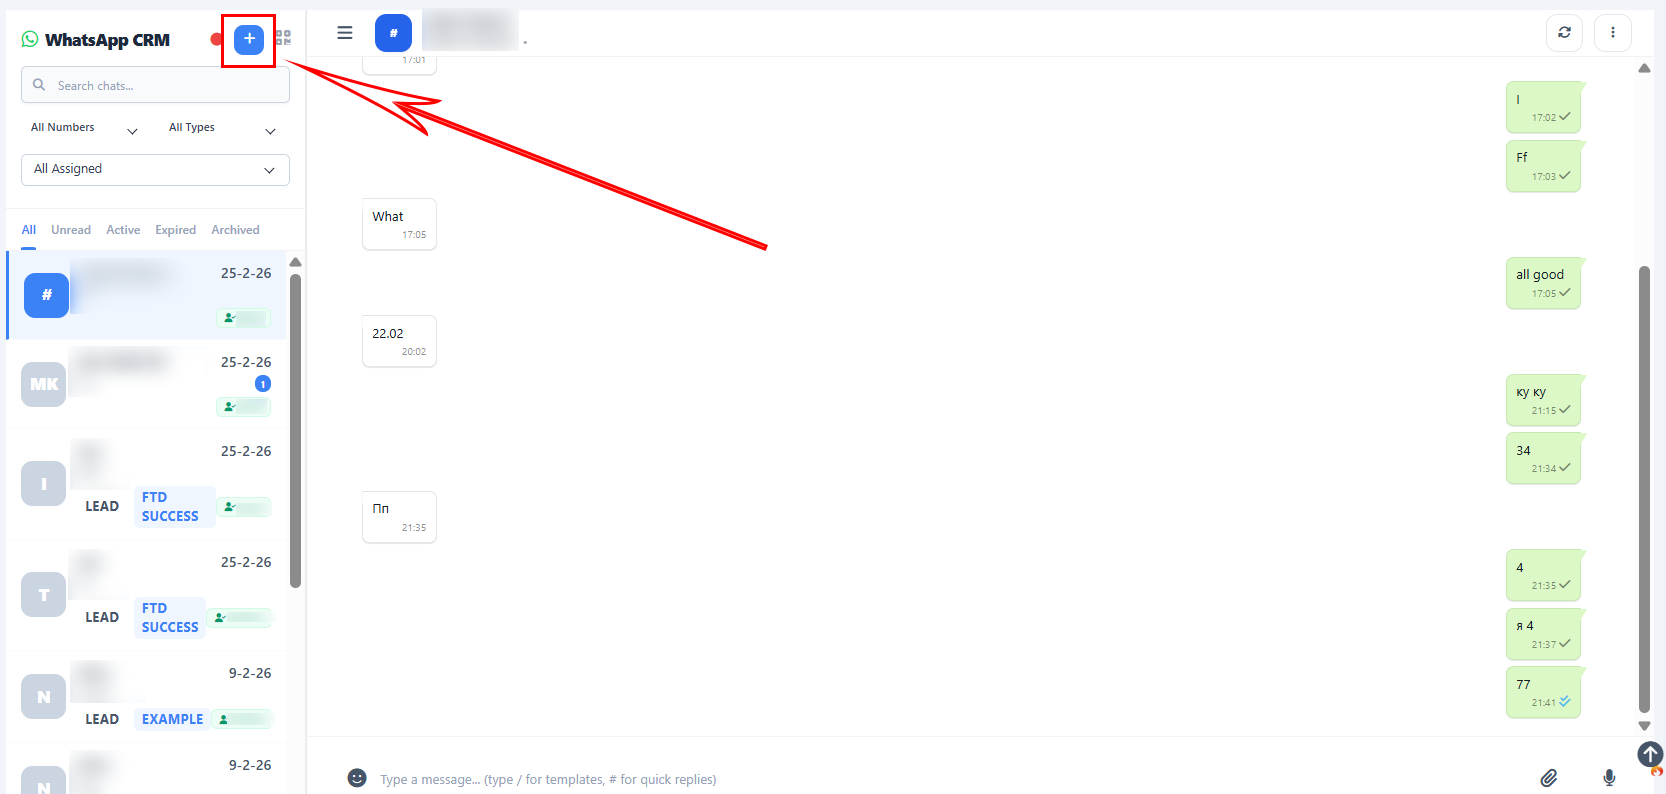
To start a new chat (if available in your setup), use the "+" button near the chat search, select the WhatsApp number and contact, and then send your first message.
How to use filters and statuses
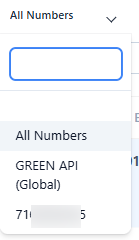
Use the All Chats dropdown to select a specific WhatsApp provider, such as your connected number (for example GREEN API).
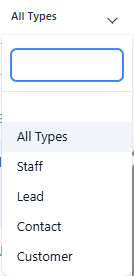
Use All Types to show only leads, clients, staff, or customers, depending on who you want to focus on.
Use All Statuses to focus on specific lead statuses like New Lead, Busy, No Answer, Follow up, Awaiting deposit, and more, so agents can work the right priority list.
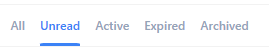
Use Active Chats / Unread Chats / Expired Chats to see only the conversations that need attention now.
Linking chats with staff and workload
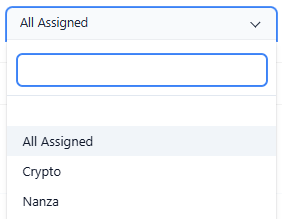
Use the All Staff filter to see chats assigned to a specific agent (for example Tony, Paully, Syl, etc.).
This helps team leaders quickly check how many chats each agent is handling and follow up on their work.
Agents can focus only on their own chats by choosing their name in the staff filter.
Using templates and quick replies
In the WhatsApp menu you can open Templates to prepare ready messages (for example: welcome messages, verification messages, deposit reminders).
In Quick Replies you can save short, frequently used answers that can be inserted in one click during a chat.
Templates and quick replies help agents reply faster and keep the same style and wording for all clients.
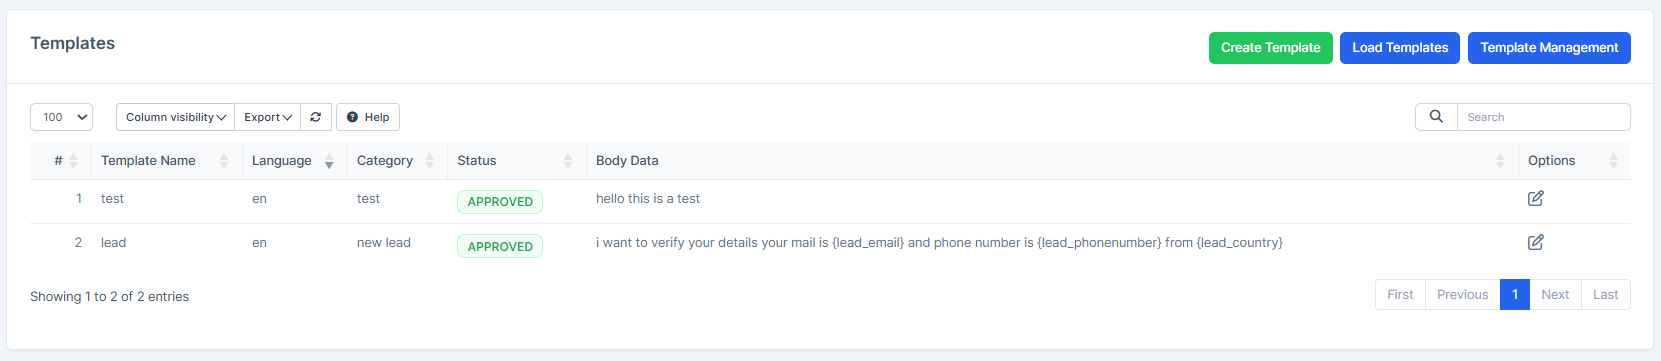
Templates let you create and manage pre-approved WhatsApp message templates that follow WhatsApp's guidelines.
Each template has a name, language, category, and body content.
You can click "Load Templates" to sync templates from your WhatsApp provider account.
Click "Template Management" to open your WhatsApp provider's console (for example Facebook Business Manager) where you can create and manage templates.
Templates must be approved by WhatsApp before use and help ensure compliance with messaging policies.
Quick Replies are short, frequently used messages that agents can insert in one click during customer chats.
You can create replies with a name (for example "Thanks for contacting") and the message text.
Agents use Quick Replies to reply faster to common questions without typing the same response repeatedly.
You can add, edit, or delete quick replies from this page.
Campaigns and bulk messaging
The Campaigns section allows you to send WhatsApp messages to many contacts at once, for example promotions, updates, or reactivation messages.
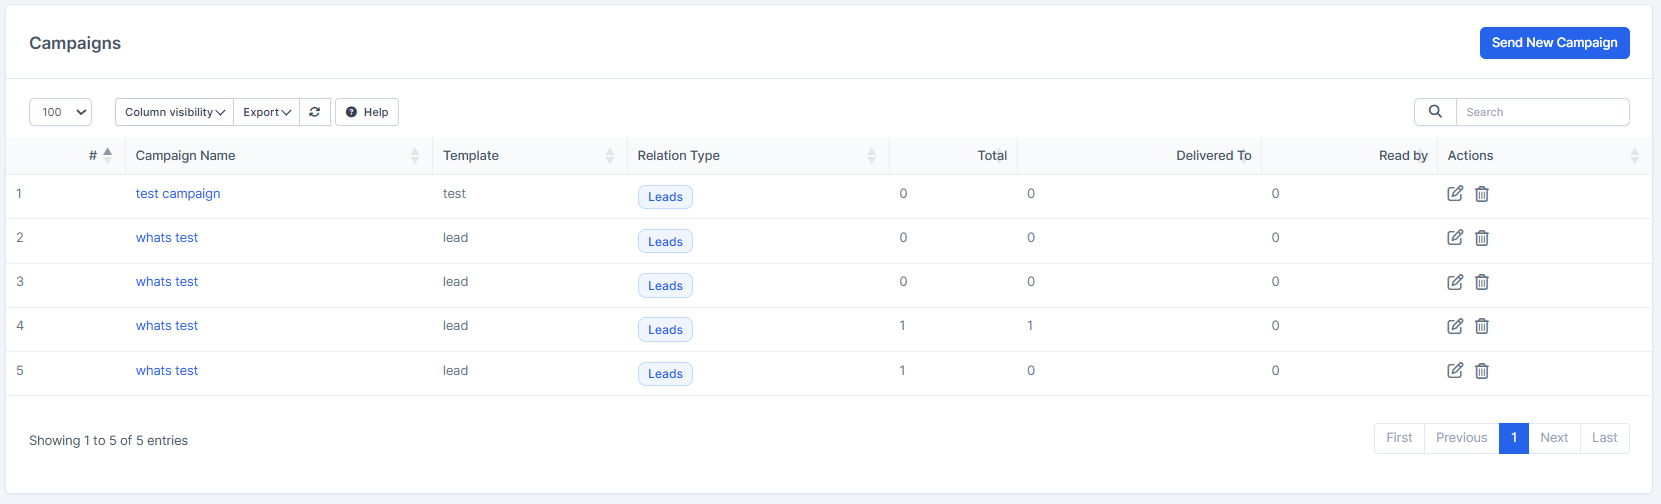
You choose the WhatsApp number, the audience, and the message (often based on a template), then start the campaign.
Campaign results can be followed up directly from the chat list as new replies arrive.
The Campaigns page allows you to send bulk WhatsApp messages to many contacts at once.
You can create campaigns with a name, select a template, choose which contacts to reach (relation type), and view delivery statistics.
Each campaign shows: total messages sent, number delivered, and how many were read.
Click "Send New Campaign" to start a new campaign and reach a large audience with promotional, informational, or transactional messages.
Results are displayed in real-time, showing how many messages reached each recipient.
Activity log and tracking
The Activity Log section shows a timeline of WhatsApp actions, such as sent messages, received messages, and system activities.
This log helps managers see who contacted which client, when, and with what message.
It is useful for quality control, training, and resolving disputes with clients.
The Activity Log is a complete history of all WhatsApp actions in your CRM.
You can view logs that show: what happened (category), who was involved (name), which template was used, the response code, the message type, and when it was recorded.

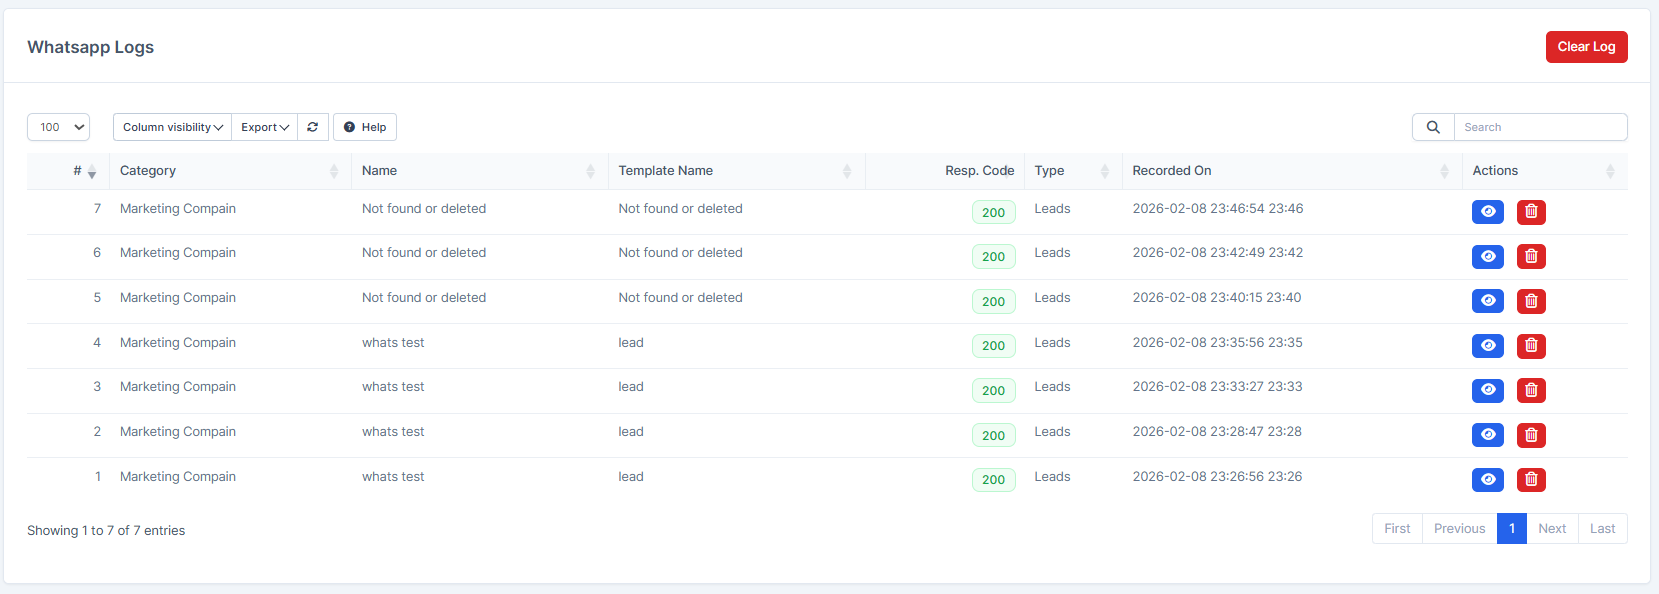
Click "Clear Log" to remove old activity records and keep your logs organized.
Use the search and filters to find specific WhatsApp interactions for auditing or training purposes.
This log is essential for managers to monitor team performance and ensure compliance.
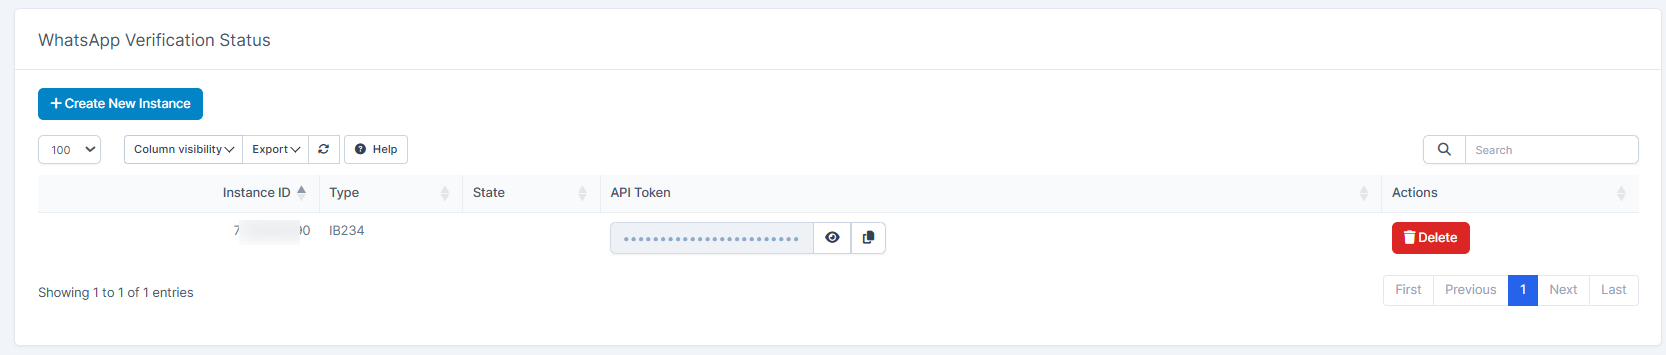
WhatsApp Numbers
The WhatsApp Numbers page displays your connected WhatsApp numbers and their verification status with the WhatsApp provider.
This page shows which WhatsApp accounts are active and ready to send and receive messages.
You can manage multiple WhatsApp numbers from this section, each connected to a different provider (like GREEN API).
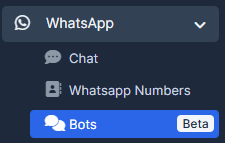
Bots
The Bots section (currently in Beta) allows you to set up automated WhatsApp bots to handle common customer inquiries.
Bots can respond to frequently asked questions and route complex requests to live agents.
This feature helps reduce agent workload and provides instant responses to customers 24/7.
Settings
The Settings page (WhatsApp Chat Configuration) is where you configure how WhatsApp integrates with your CRM.
To check the availability of WhatsApp setup, press on the link "Open GREEN API Console". If the site opens well, it will ensure in proper connection with your WhatsApp. If the site doesn't open, enable VPN.
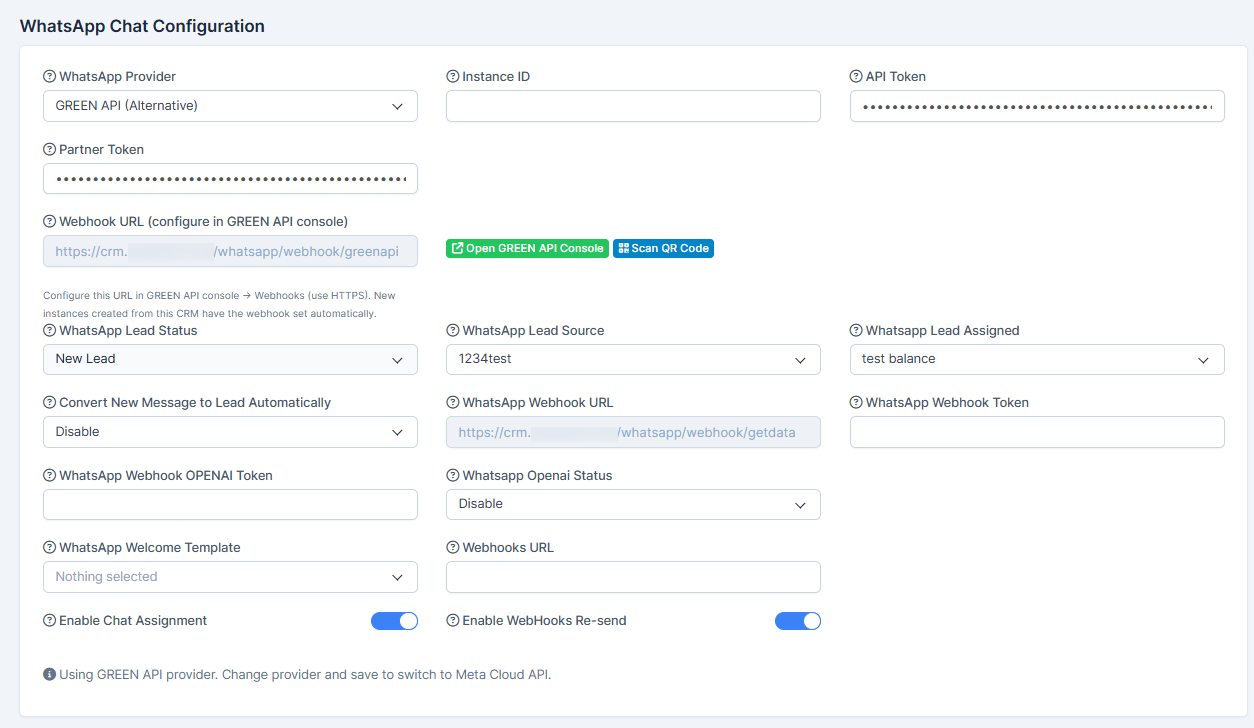
Key settings include:
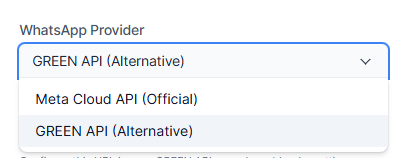
- WhatsApp Provider: Choose between Meta Cloud API (official) or GREEN API (alternative).
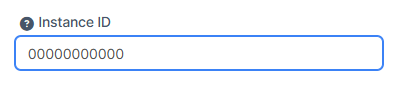
- Instance ID and API Token: Credentials to connect your WhatsApp account.
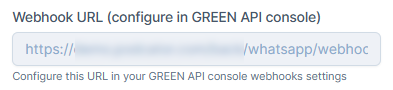
- Webhook URL: The address where WhatsApp sends your incoming messages (you configure this in your provider's console).
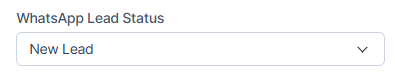
- WhatsApp Lead Status: Choose which lead status is assigned to new WhatsApp contacts (for example New Lead).
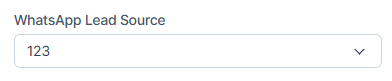
- WhatsApp Lead Source: Choose which lead source applies to WhatsApp conversations (for example 123).
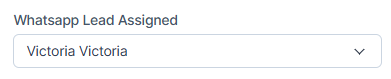
- Whatsapp Lead Assigned: Select which staff member receives newly converted leads from WhatsApp.
- Convert New Message to Lead Automatically: Enable or disable auto-conversion of incoming messages into leads.
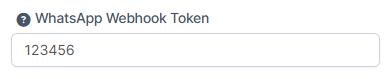
 - WhatsApp Webhook Token: A security token for validating incoming webhook messages.
- OPENAI Token and Status: Enable AI-powered responses if you want automated intelligent replies.
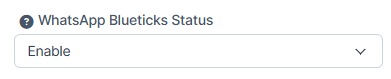
 - Blueticks Status: Enable to show message delivery and read receipts.
- Welcome Template: Select a template to automatically send when a new customer starts a conversation.

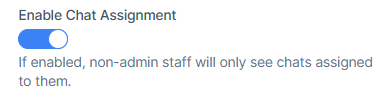
- Enable Chat Assignment: If enabled, non-admin staff only see chats assigned to them.
Configuring these settings properly ensures WhatsApp works smoothly with your CRM and automates lead management.
Basic day‑to‑day workflow for an agent
Open WhatsApp → Chat at the start of your shift and filter by Unread Chats to answer all new messages.
Switch to Active Chats and the statuses you are responsible for (for example Follow up, Awaiting deposit) and continue conversations.
Use templates and quick replies to reply fast, and keep the client's status in the CRM aligned with the progress of the chat.
How to Configure WhatsApp Settings Step-by-Step
Step 1: Choose Your WhatsApp Provider
Go to Settings → WhatsApp Chat Configuration → WhatsApp Provider dropdown.
Select "GREEN API (Alternative)" if you want a cost-effective option with good features.
Select "Meta Cloud API (Official)" if you want to use WhatsApp's official provider.
Result: Your CRM connects to your chosen WhatsApp provider and can send/receive messages through it.
Step 2: Add Your Instance ID and API Token
Go to your WhatsApp provider's console (for example GREEN API at https://console.green-api.com/).
Find your Instance ID and copy it to Settings → Instance ID field.
Find your API Token and copy it to Settings → API Token field.
Result: Your CRM can now authenticate with WhatsApp and handle your messages securely.
Step 3: Set Up the Webhook URL
Go to your provider's console settings and find "Webhooks" or "Notifications" section.
Copy the Webhook URL from Settings → WhatsApp Webhook URL field in your CRM.
Paste it into your provider's webhook settings.
Result: Your CRM receives notifications when customers send WhatsApp messages, so replies appear instantly.
Step 4: Assign a Lead Status
Go to Settings → WhatsApp Lead Status.
Choose a status from the dropdown (for example "New Lead", "Follow up", etc.).
This status is automatically assigned to new contacts from WhatsApp.
Result: All new WhatsApp contacts are tagged with the correct status for your team to prioritize.
Step 5: Choose a Lead Source
Go to Settings → WhatsApp Lead Source.
Select which lead source these contacts come from (for example "123", "Google", "Import").
Result: You can track where each lead came from and measure WhatsApp's effectiveness as a channel.
Step 6: Assign WhatsApp Leads to Staff
Go to Settings → Whatsapp Lead Assigned.
Select which staff member receives new WhatsApp leads (for example Tony, Paully, Syl).
Result: New WhatsApp conversations are automatically assigned to the right person on your team.
Step 7: Enable Auto-Convert Messages to Leads
Go to Settings → Convert New Message to Lead Automatically.
Select "Enable" if you want every incoming WhatsApp message to automatically create a new lead.
Select "Disable" if you only want certain messages converted to leads.
Result: Messages are converted to leads automatically (if enabled), so nothing gets missed.
Step 8: Add Your Webhook Token
Go to Settings → WhatsApp Webhook Token.
Enter a secure token (example: "123456" or a random string).
This token validates that incoming messages are really from WhatsApp and not from hackers.
Result: Your CRM is protected from fake messages and only accepts authentic WhatsApp data.
Step 9: Enable AI-Powered Replies (Optional)
Go to Settings → WhatsApp Webhook OPENAI Token.
If you have an OpenAI API token, paste it here.
Go to Settings → Whatsapp Openai Status.
Select "Enable" to let AI automatically respond to common questions.
Result: Customers get instant replies 24/7, and your agents handle only complex questions.
Step 10: Show Message Delivery Status
Go to Settings → WhatsApp Blueticks Status.
Select "Enable" to see single checkmark (sent), double checkmark (delivered), or blue checkmark (read).
Select "Disable" if you don't want to track message read status.
Result: You and your team know exactly when messages are delivered and read by customers.
Step 11: Send Welcome Messages
Go to Settings → WhatsApp Welcome Template.
Select one of your approved message templates from the dropdown.
This template is automatically sent when a new customer starts a WhatsApp conversation.
Result: Every new customer gets a friendly greeting, introduction, or menu automatically.
Step 12: Control Who Sees Which Chats
Go to Settings → Enable Chat Assignment.
Select the checkbox to enable this feature.
If enabled, non-admin agents only see chats assigned to them and cannot view other chats.
If disabled, all agents can see all chats (useful for small teams).
Result: Your team has better privacy and agents focus on their own chats, not others'.
Saving Your Settings
After making any changes, scroll to the bottom of the Settings page and click "Save Settings" button.
You will see a success message confirming your changes are saved.
Result: All your configurations are now active and WhatsApp will work according to your settings.
Common Configuration Examples
Example 1: Basic Setup for a Small Team
1. Choose GREEN API as provider
2. Add your Instance ID and API Token
3. Set Lead Status to "New Lead"
4. Set Lead Source to "WhatsApp"
5. Assign all leads to one manager
6. Enable auto-convert messages to leads
7. Enable Blueticks Status
Result: All WhatsApp messages become leads, assigned to your manager, with delivery tracking.
Example 2: AI-Powered Customer Service
1. Complete basic setup first
2. Add OpenAI token for AI replies
3. Enable Openai Status
4. Select a Welcome Template (for example "Hello template")
5. Enable Chat Assignment so agents only see their chats
Result: New customers get instant AI replies, and your team handles follow-ups efficiently.
Example 3: Team with Multiple Agents
1. Complete basic setup first
2. Disable Chat Assignment so all agents see all chats
3. Assign leads to each agent (by rotating or by specialty)
4. Enable auto-convert so all messages become trackable leads
5. Enable Blueticks Status for transparency
Result: Your entire team sees incoming chats in real-time and can jump in to help.
Troubleshooting Tips
Messages Not Arriving?
Check that your Webhook URL is correctly configured in your provider's console.
Verify your Webhook Token is the same in both your CRM and provider's console.
Make sure your API Token is current and not expired.
Leads Not Being Created?
Check that "Convert New Message to Lead Automatically" is set to "Enable".
Verify the WhatsApp Lead Status is not blank.
Make sure at least one staff member is selected in "Whatsapp Lead Assigned".
Agents Can't See Chats?
If Chat Assignment is enabled, check that chats are assigned to that agent.
If still not visible, disable Chat Assignment temporarily to test.
Make sure the agent is an active user in the CRM.
AI Replies Not Working?
Verify your OpenAI token is valid and has credits available.
Check that "Whatsapp Openai Status" is set to "Enable".
Make sure you selected a Welcome Template.
Note: AI only works for the first welcome message, not ongoing conversations.