Click2Call User Guide
What is Click To Call?
Click2Call is a professional telephony integration module for CRM that enables direct calling functionality through multiple VoIP providers. It provides seamless integration with popular telephony platforms, agent number management, call logging, and comprehensive analytics for outbound calling activities.
Setup Instructions
Step 1: Permissions Configuration
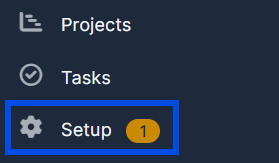
Step 1. Head over to the "Setup".

Step 2. Select "Staff".

Step 3. Choose the staff member, press on the "Options" and select "Permissions".
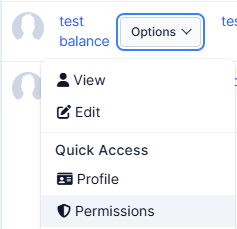
Step 4. On "Permissions" find the Click2Call category and select required permissions.
-View: Access Click2Call features
-Create: Add agent numbers and make calls
-Edit: Modify agent number configurations
-Delete: Remove agent numbers and logs

Step 2: Provider Configuration
Setting up the Provider
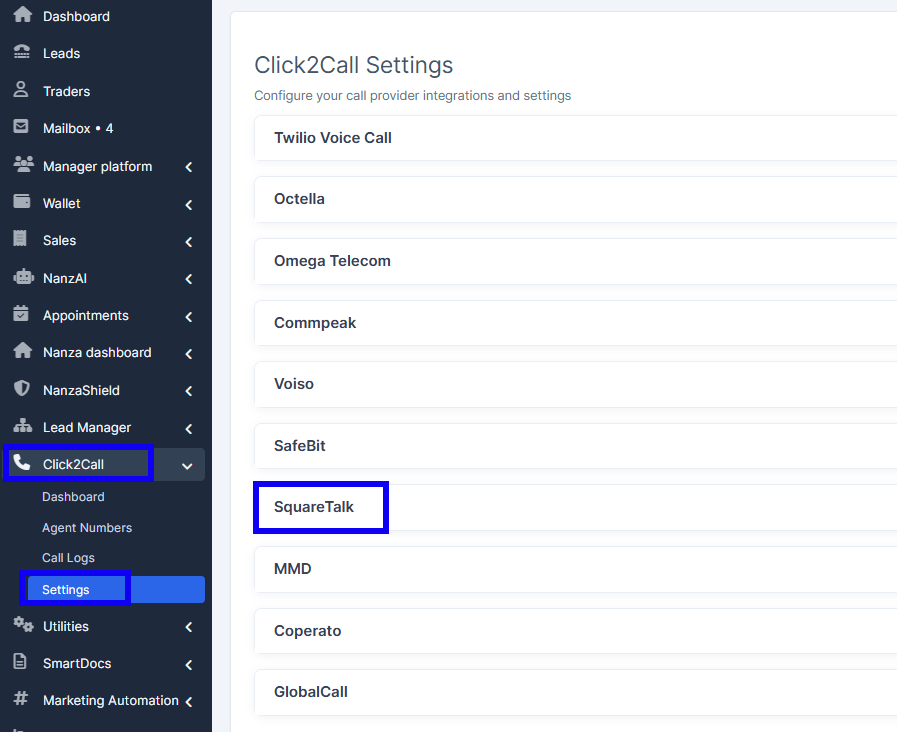
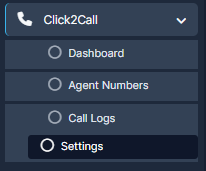
Step 1. Head over to the "Click2Call" in the left menu. Choose the "Settings" and choose your provider.
Step 2. Fill in the fields your provider has sent to you. Make sure to enable your integration.
Available Providers & their requirements
| Provider | Configuration details |
|---|---|
| Omega Telecom Configuration |
- Domain: API endpoint (e.g., https://omega-telecom.net) - Username: API username - Password: API password - Note: Agent number used as source number (snumber) |
| Commpeak Configuration |
- API Key: Commpeak API authentication key - ID CRM System: CRM system identifier - ID of Client: Client identifier - Status: Enable/disable integration |
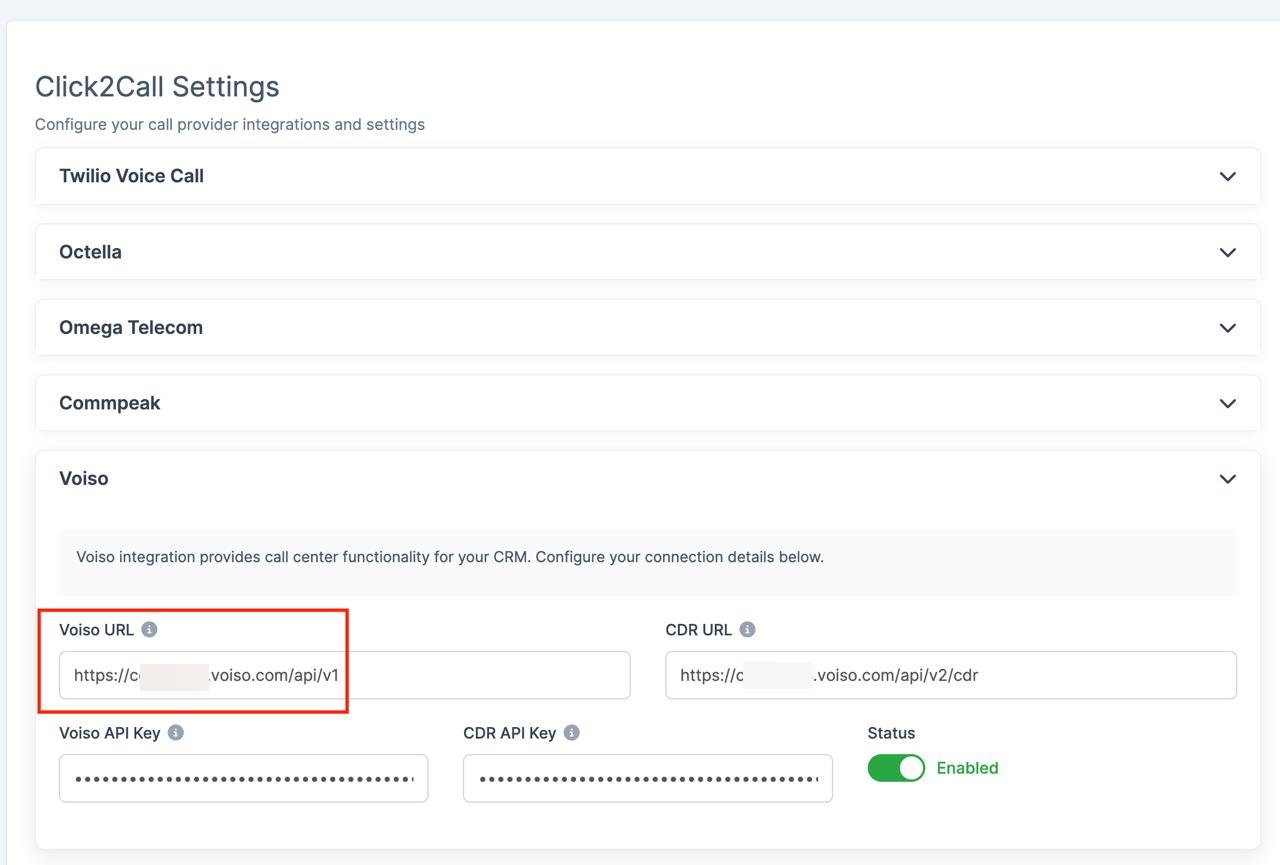
| Voiso Configuration |
- Voiso URL: Main API endpoint - CDR URL: Call Detail Records endpoint - Voiso API Key: Main API authentication - CDR API Key: CDR access key - Note: Agent Number = Voiso Agent/Extension for this staff member; also used when importing CDRs into Call Logs
|
| Twilio Voice Call Configuration |
- Account SID: Twilio account identifier - Auth Token: Authentication token - Phone Number: Twilio phone number (E.164 format) - TwiML App SID: Application identifier - Call Recording: Enable/disable recording - Integration Status: Enable/Disable |
| Octella Configuration |
- API Key: Access token for authentication - Virtual Number Group ID: Group identifier - Note: Agent number used as employee phone number |
| SafeBit Configuration |
- SafeBit Domain: Provider domain URL - Auth Token: Authentication token/file:1 |
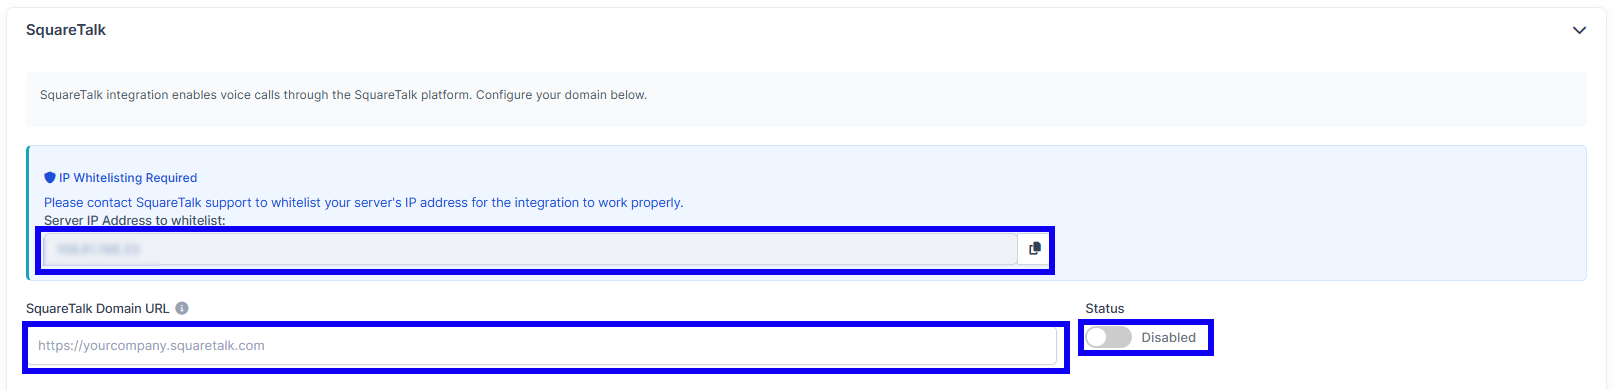
| SquareTalk Configuration |
- SquareTalk Domain URL: Provider domain/API URL - API credentials: As provided by SquareTalk - Server IP to whitelist: Use the IP shown in the SquareTalk block on the Settings page - Note: Agent Number = SquareTalk Agent/Extension used for this staff user |
| MMD Configuration (Legacy/Outdated) |
- MMD Login: Legacy login - MMD Token: Legacy token - Note: Kept for backwards compatibility; use MMD v2 for new setups |
| MMD v2 Configuration (Recommended) |
- MMD v2 credentials: Updated login/token pair or API key (as provided by your MMD account) - Note: Recommended for all new integrations instead of legacy MMD |
| Coperato Configuration | - Coperato URL: Provider URL only |
| GlobalCall Configuration |
- No extra configuration beyond enabling the provider in Settings - Note: Once enabled and Agent Numbers are assigned, you can start calling immediately |
| GlobalTelSolutions Configuration |
- API / Domain URL: Provider base URL - Authentication details: Credentials supplied by GlobalTelSolutions - Note: Agent Number should match the extension/agent ID in the GlobalTelSolutions system |
| GoldenVoIP Configuration |
- GoldenVoIP Domain/API URL: Provider base URL - Username or API Key: As provided by GoldenVoIP - Password/Secret: Authentication secret - Note: Agent Number = GoldenVoIP extension/agent ID for that staff member |
| FreJun |
- API / Domain URL: Provider base URL - The agent number field stores an email address instead of an agent extension - Doesn't need a SoftPhone |
Step 3. Press the "Save settings" button at the bottom right corner of the page to apply the changes.
![]()
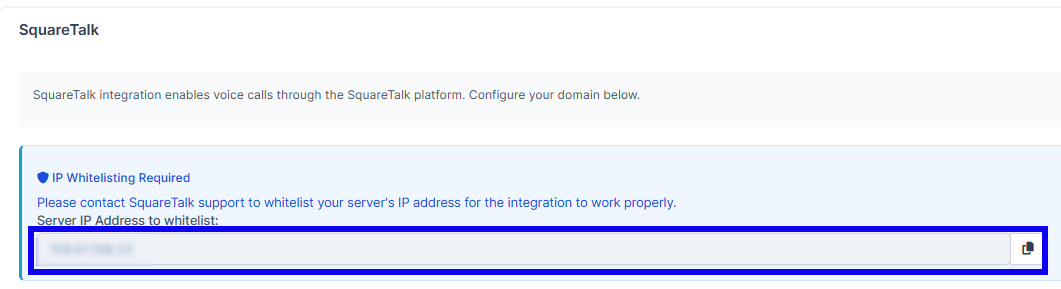
Finding Your Server IP Address
Step 1. Head over to the "Click2Call" in the left menu. Choose the "Settings" and choose your provider. Choose "SquareTalk".
Step 2. In the IP field you will be able to find there your server IP address.
Step 3: Agent Number Setup
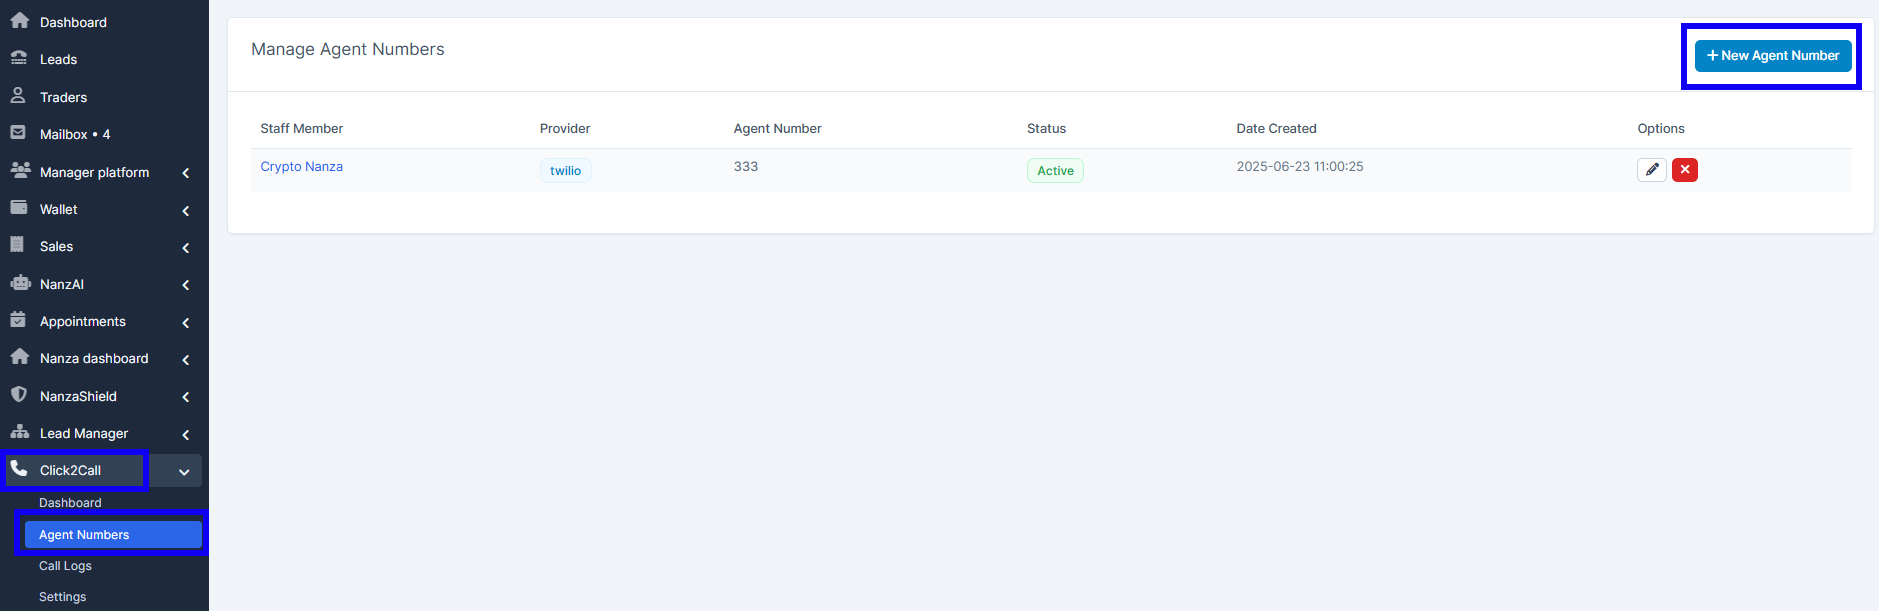
WAY 1
Step 1. Head over to the "Click2Call" in the left menu. Choose the "Agent Numbers" and press on the "New Agent Number" .
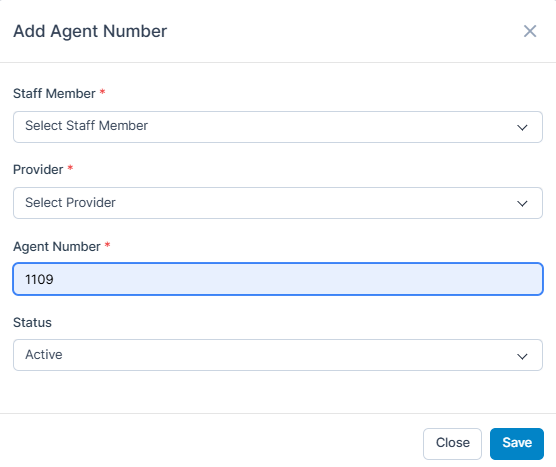
Step 2. Fill in the required fields marked with * and activate the status of the agetn's number. Press on "Save" to save the permissions.
WAY 2
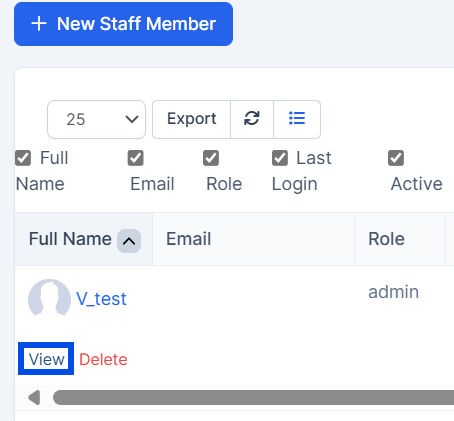
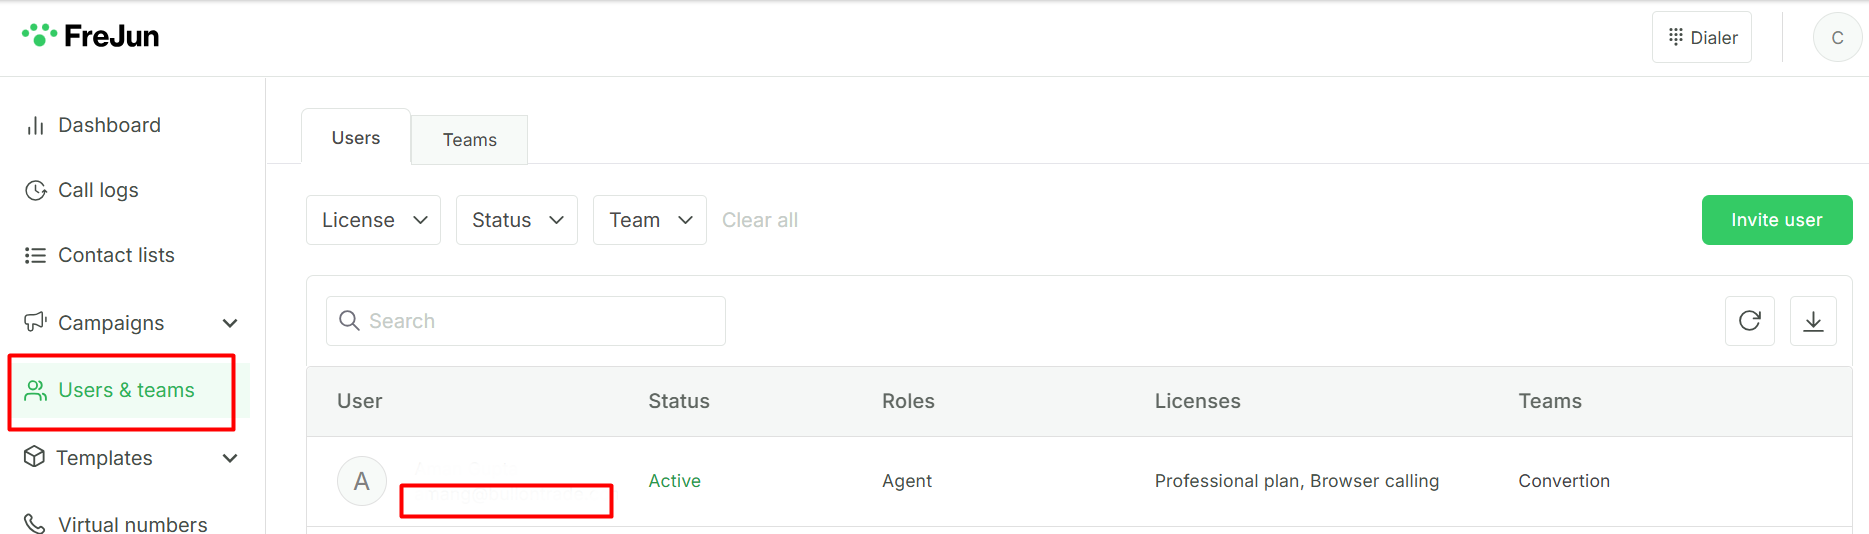
Step 1. Go to "Setup" in the settings panel on the left side of the screen.
Step 2. Go to "Staff".

Step 3. Once inside "Staff" find the user you want to change the option for and press "View".
Step 4. Press on "Click2Call" and then to "Add Agent Number".
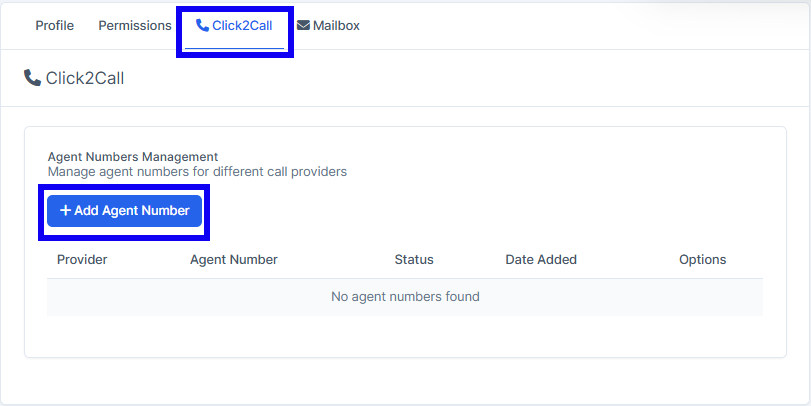
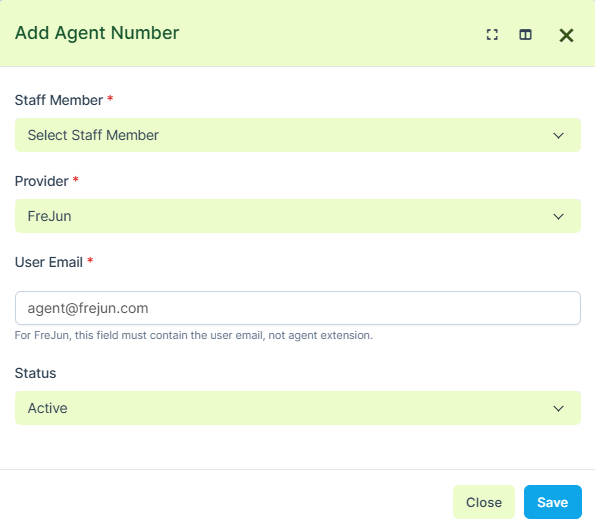
Step 5. Fill in the required fields marked with * and activate the status of the agent's number. Press on "Save" to save the permissions.
Core Features Usage
Making Calls
Step 1. Go to "Leads", choose the client and press on the phone button. Choose the provider, the system will engage the call.
 Phone Number Click: Click any phone number
Call Modal: Call initiation dialog appears
Provider Selection: System uses configured provider
Call Initiation: Call connects via selected provider
Call Process:
- System checks staff agent number
- Validates provider configuration
- Initiates call through provider API
- Creates call log entry
- Tracks call status and outcome
Call Management
Call Interface:
- Call Modal: Pop-up interface for calls
- Progress Tracking: Call status updates
- Session Management: Track active calls
- Error Handling: Display connection issues
Call Logging:
- Automatic Logging: All calls logged automatically
- Session IDs: Unique call identifiers
- Status Tracking: Success/failure recording
- API Response: Provider response logging
Dashboard Analytics
Step 1. Go to "Click2Call" and choose "Dashboard".
Key Metrics:
- Success Rate: Percentage of successful calls
- Recent Calls: Latest call activities
- Provider Status: Configuration overview
- Agent Numbers: Setup status
Performance Metrics:
- Total Calls: Call volume statistics
- Success Rate: Call completion percentage
- Failed Calls: Error tracking
- Provider Performance: Provider-specific metrics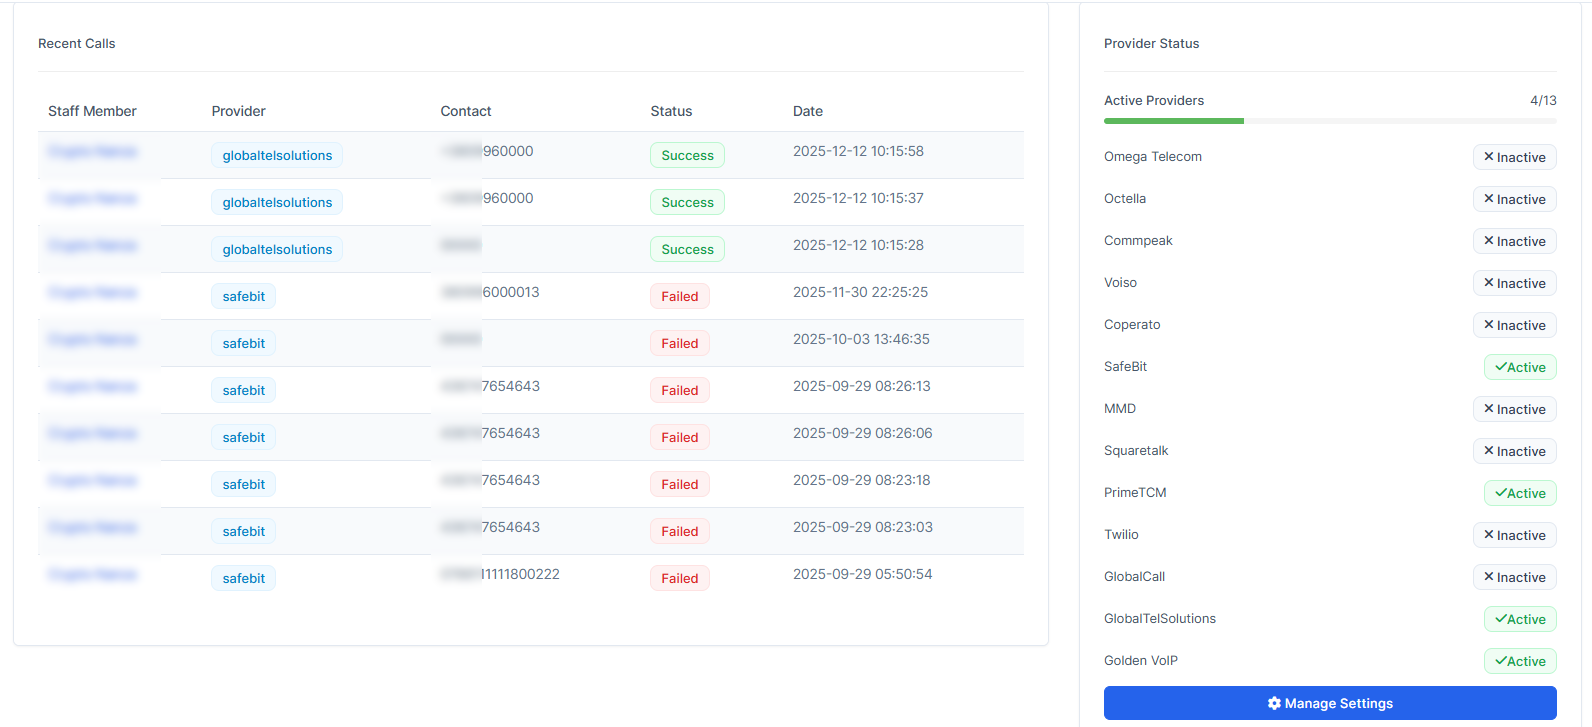
Call Logs Management
Step 1. To see all your call logs go to "Call Logs" in the settings panel on the left side of the screen.
Step 2. "Call Logs" this is where you will receive all your call logs

Log Information:
- Staff Member: Caller information
- Contact Number: Called number
- Contact Type: Customer/Lead classification
- Provider: Used telephony provider
- Status: Call outcome
- Date: Call timestamp
- Session ID: Unique call identifier
Filtering Options:
- Status Filter: All/Successful/Failed calls
- Staff Filter: Filter by staff member
- Date Range: Time period selection
- Provider Filter: Filter by provider
Call Log Details:
- Call Information: Complete call details
- API Response: Provider response data
- Error Messages: Failure reason details
- Retry Option: Retry failed calls
Advanced Features
Call Retry Functionality:
Open failed call log
Click Retry Call
Confirm retry action
New call initiated with same parameters
Multiple Provider Management:
- Provider Switching: Automatic failover options
- Load Balancing: Distribute calls across providers
- Provider Priority: Configure preferred providers
- Cost Optimization: Route calls based on costs
Limitations
Technical Constraints
Provider Dependencies:
- Internet Connection: Required for API communication
- Provider Availability: Dependent on provider uptime
- API Limits: Provider-specific rate limits
- Authentication: Valid credentials required
System Limitations:
- Browser Compatibility: Modern browser required
- Permission Dependencies: Staff permissions control access
- Configuration Requirements: Each provider needs setup
- Number Format: Provider-specific format requirements
Operational Constraints
Call Management:
- One Provider per Call: Cannot mix providers in single call
- Agent Number Required: Staff must have configured number
- Manual Configuration: Each staff/provider combination needs setup
- Provider-Specific: Features vary by provider
Best Practices
Provider Management
Multi-Provider Strategy:
- Redundancy: Configure multiple providers for backup
- Cost Optimization: Use different providers for different regions
- Quality Monitoring: Track success rates by provider
- Load Distribution: Balance calls across providers
Agent Number Management
Staff Configuration:
- Unique Numbers: Assign unique numbers per staff/provider
- Regular Testing: Periodic test calls to verify functionality
- Documentation: Maintain record of number assignments
- Training: Train staff on click-to-call procedures
Call Management
Effective Calling:
- Number Verification: Verify phone numbers before calling
- Provider Selection: Choose appropriate provider for destination
- Call Timing: Consider time zones for international calls
- Follow-up: Log call outcomes and follow-up requirements
Analytics and Monitoring
Performance Tracking:
- Success Rates: Monitor overall and provider-specific rates
- Call Volume: Track calling activity by staff and time
- Error Analysis: Investigate failed call patterns
- Provider Performance: Compare provider effectiveness
Voiso and SquareTalk: new behaviour
For both Voiso and SquareTalk we added optional display settings that control how options appear in the call widget dropdown (the phone icon menu).
These settings do not change call logic, only how options are labeled for users.
1) Voiso – “Show Voiso caller ID value in call widget labels”
Setting key: voiso_show_caller_id_in_widget
Location: Click2Call Settings → Voiso section

What it does
This option controls how Voiso caller IDs are displayed in the call widget when multiple caller IDs are configured for an agent number.
When DISABLED (default behavior):
Each Voiso option shows only the caller ID name:
Call (Voiso · Main Office)
Call (Voiso · Sales Line)
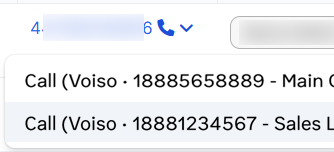
When ENABLED:
Each Voiso option shows both the caller ID value and its name:
Call (Voiso · 18885658889 - Main Office)
Call (Voiso · 18881234567 - Sales Line)
What doesn’t change
The number of options in the dropdown stays the same.
Which caller ID is actually sent to Voiso does not change.
The setting only affects how users see and distinguish caller IDs in the UI.
Why it’s useful
Helps agents quickly see which exact number will be presented to the customer.
Reduces mistakes when multiple caller IDs have similar names.
2) SquareTalk – “Show SquareTalk prefix value in call widget labels”
Setting key: squaretalk_show_prefixes_in_widget
Location: Click2Call Settings → SquareTalk section
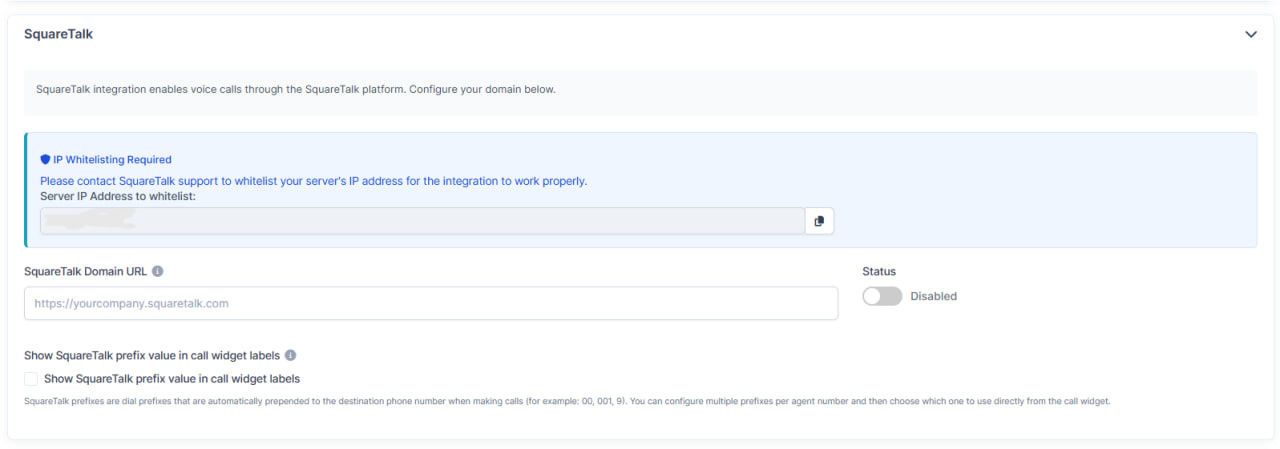
What it does
This option controls how SquareTalk prefixes are displayed in the call widget when multiple prefixes are configured for an agent number.
A SquareTalk prefix is a dial prefix automatically prepended to the destination phone number when calling (for example: 00, 001, 9), typically used to route calls via different trunks, countries, or billing rules.
When DISABLED (default behavior):
Each SquareTalk option shows only the prefix name:
Call (SquareTalk · Canada)
Call (SquareTalk · UK Line)
Call (SquareTalk · No Prefix)
When ENABLED:
Each SquareTalk option shows both the prefix value and its name:
Call (SquareTalk · 001 - Canada)
Call (SquareTalk · 0044 - UK Line)
Call (SquareTalk · No Prefix)

The selected prefix is still prepended to the phone number internally as before (e.g. 001 + 386890432468).
What doesn’t change
The call still uses the same prefix logic (prefix + phone).
The list of options (one per prefix + “No Prefix”) is unchanged.
Only the labels in the widget change to be more informative.
Why it’s useful
Makes it clear which dialing prefix (e.g. 001, 0044) will be used for the call.
Especially helpful when multiple prefixes exist for the same agent number (different countries or routes).
Setting Up FreJun
It works like the other providers, with two differences:
1. The agent number field stores an email address instead of an agent extension.
2. This integration does not require a softphone (MicroSIP or Zoiper).
Step 1. Go to "Setup"

Step 2. Select "Modules"

Step 3. Find "Click2Call" module. Deactivate the module and activate it again OR update the module.

Step 4. Go back to the main menu. Choose "Click2Call" and press on "Settings".
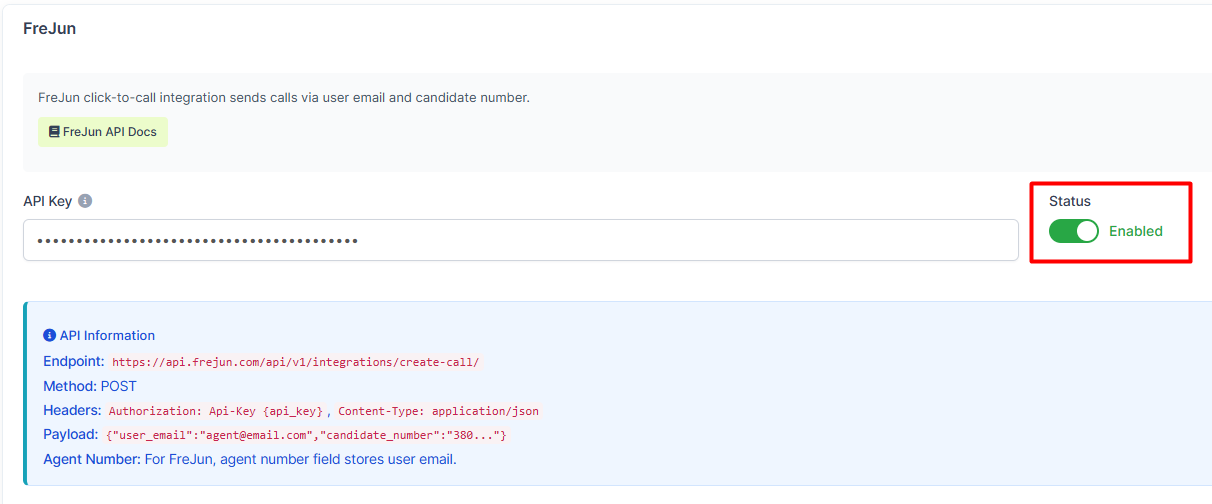
Step 5. Make sure the C2C provider is enabled with your system.
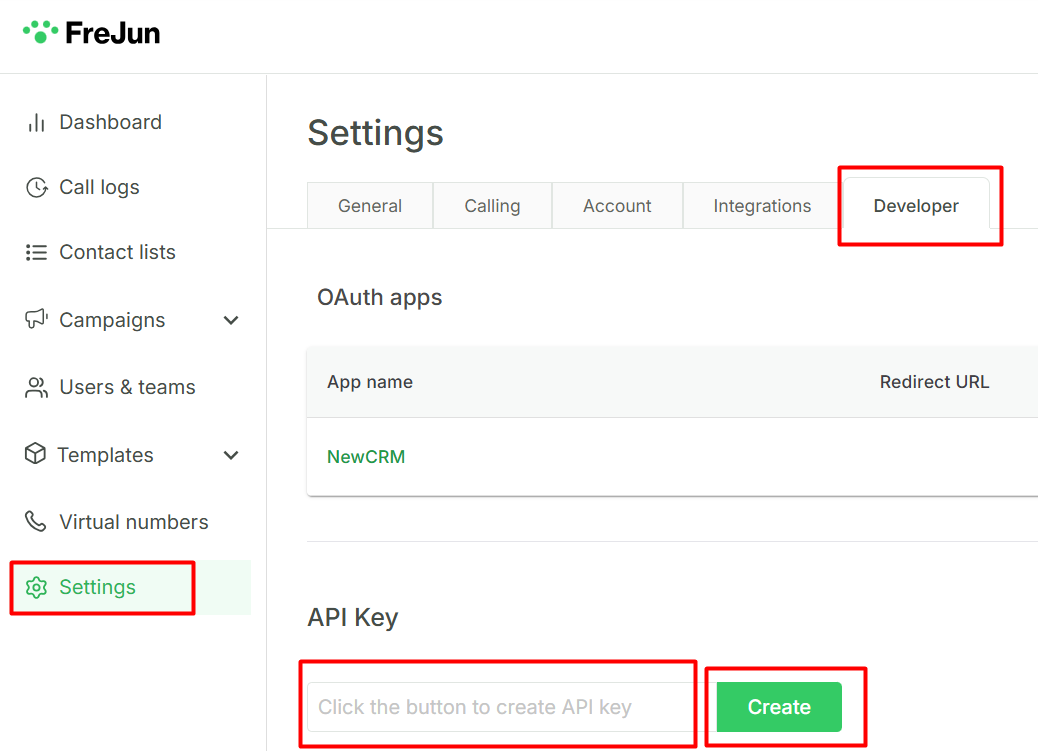
Step 6. Go to the FreJun dashboard given by your provider. Go to "Settings", choose "Develper", press on "Create" on the API key settings and copy the generated in the result key.
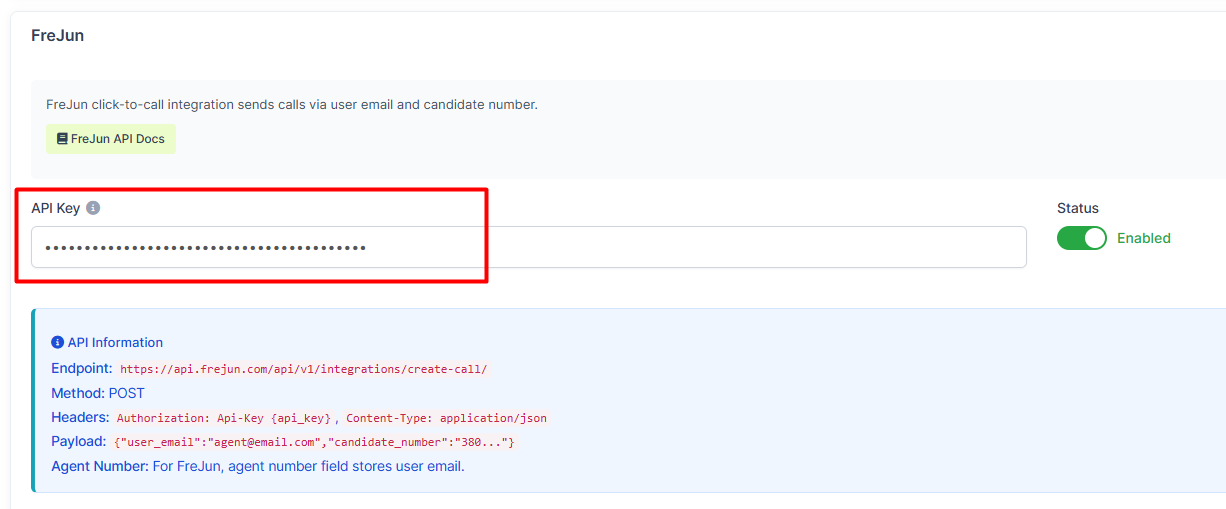
Step 7. Get back to your CRM and paste in the API key to this field. Make sure to press on "Save Settings" to remember the choice.
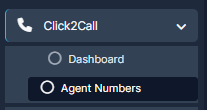
Step 8. Go to the "Click2Call" and press on the "Agent Numbers".
Step 9. Create a "New Agent Number" or edit one on the page.

Step 10. Go to the FreJun crm. Go to "New Agent Number" and copy the email of the required user.
Step 11. Set up the information. Please note, the FreJun requires an email instead of the user number. Paste the copied email in User Email field.
Make sure to "Save" the settings.
Step 12. Go to the "Click2Call" and press on the "Call Logs". Press on "Options".
Initiate the call from the Lead Manager-> Leads

Step 13. Choose "API Response". There must be "success" in the request for the successful integration.

Conclusion
Click2Call provides comprehensive telephony integration for CRM, enabling direct calling functionality through multiple VoIP providers with complete call tracking and analytics. The module streamlines customer communication by integrating calling capabilities directly into CRM workflows.
We introduced two optional UI settings:
Voiso: “Show Voiso caller ID value in call widget labels”
SquareTalk: “Show SquareTalk prefix value in call widget labels”
Both settings only affect the text in the call dropdown, not the call routing itself.
When enabled, agents see both the technical value and the friendly name (number/prefix + label), which reduces confusion and helps choose the correct CLI or route
For successful implementation:
- Configure at least one telephony provider properly
- Set up agent numbers for all calling staff
- Test configurations before production use
- Monitor call success rates and provider performance
- Train staff on proper calling procedures
This telephony integration enables businesses to improve customer communication efficiency, maintain detailed call records, and optimize calling operations through provider analytics and performance monitoring.
Before you start the integration, make sure you've got your softphone set (usually it's Microsip). Make sure to set up exactly your VoiP provider, each provider has their own requrements.