ON THE CRM
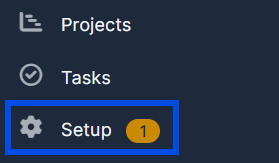
1. Go to "Setup" in the settings panel on the left side of the screen.
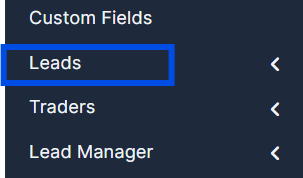
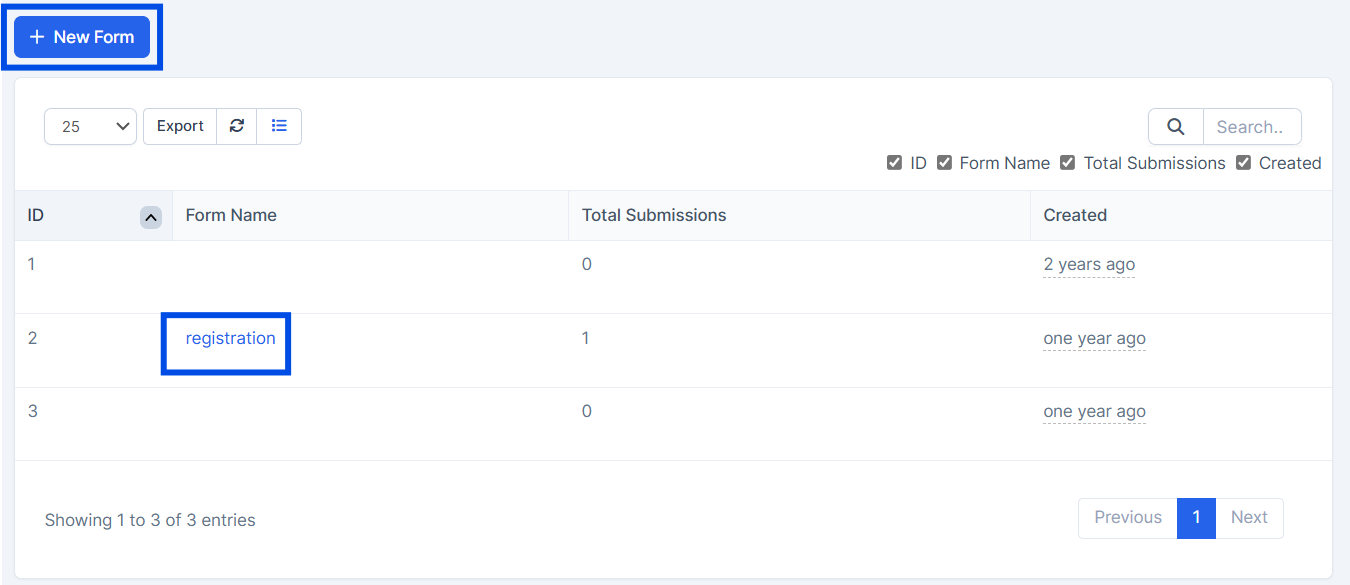
2. Inside "Setup" go to "Leads".
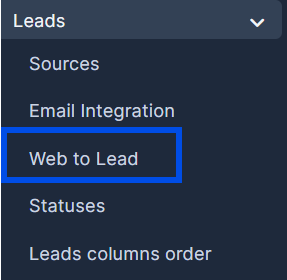
3. Inside "Leads" go to "Web To Lead".
4. Inside "Web To Lead" press on the new form button or on the default "Registration" to customize your form.
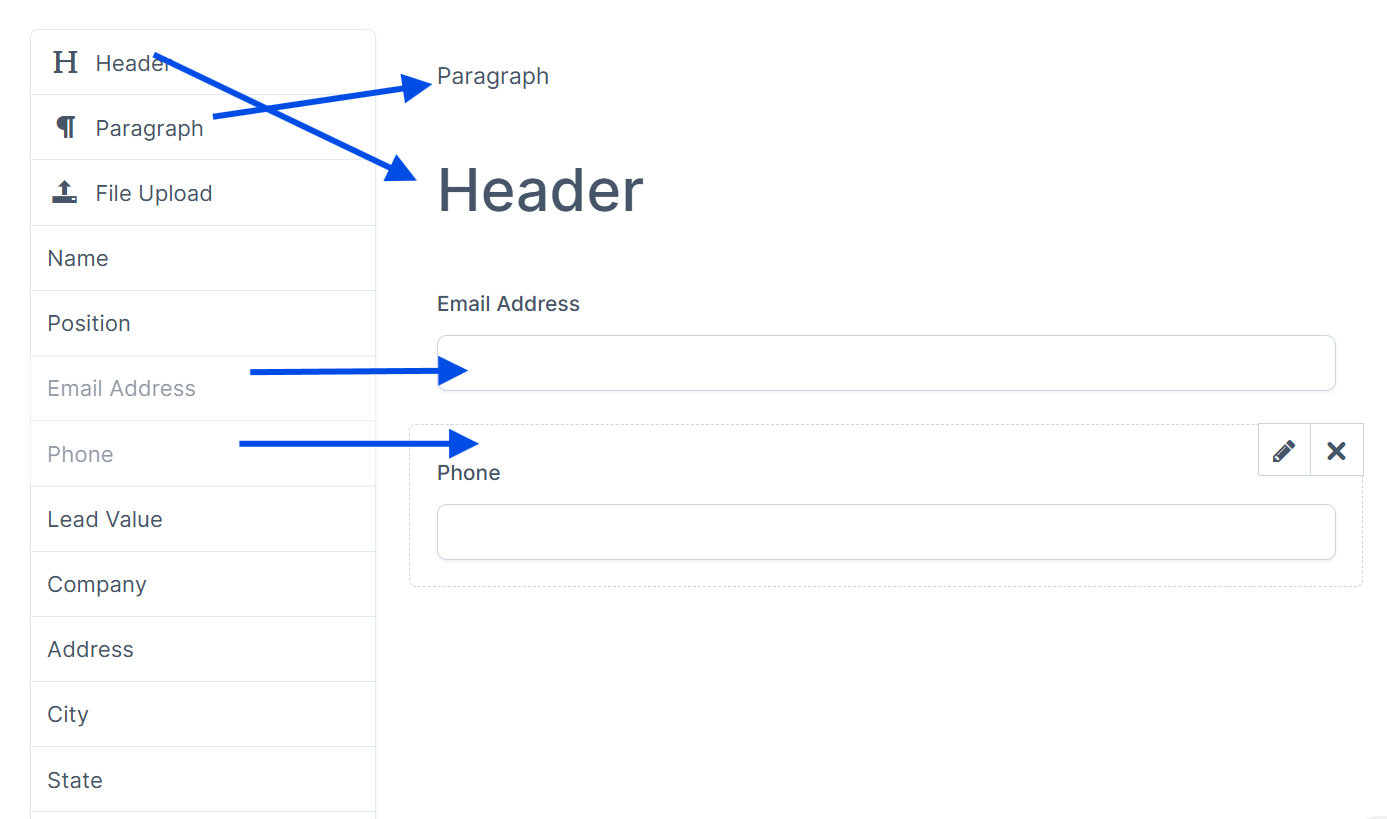
5. Inside the customizable form you are able to customize the fields by dragging the boxes into the form
6. After customizing your form be sure to press the "Save" button to save your changes.

Form Information And Setup
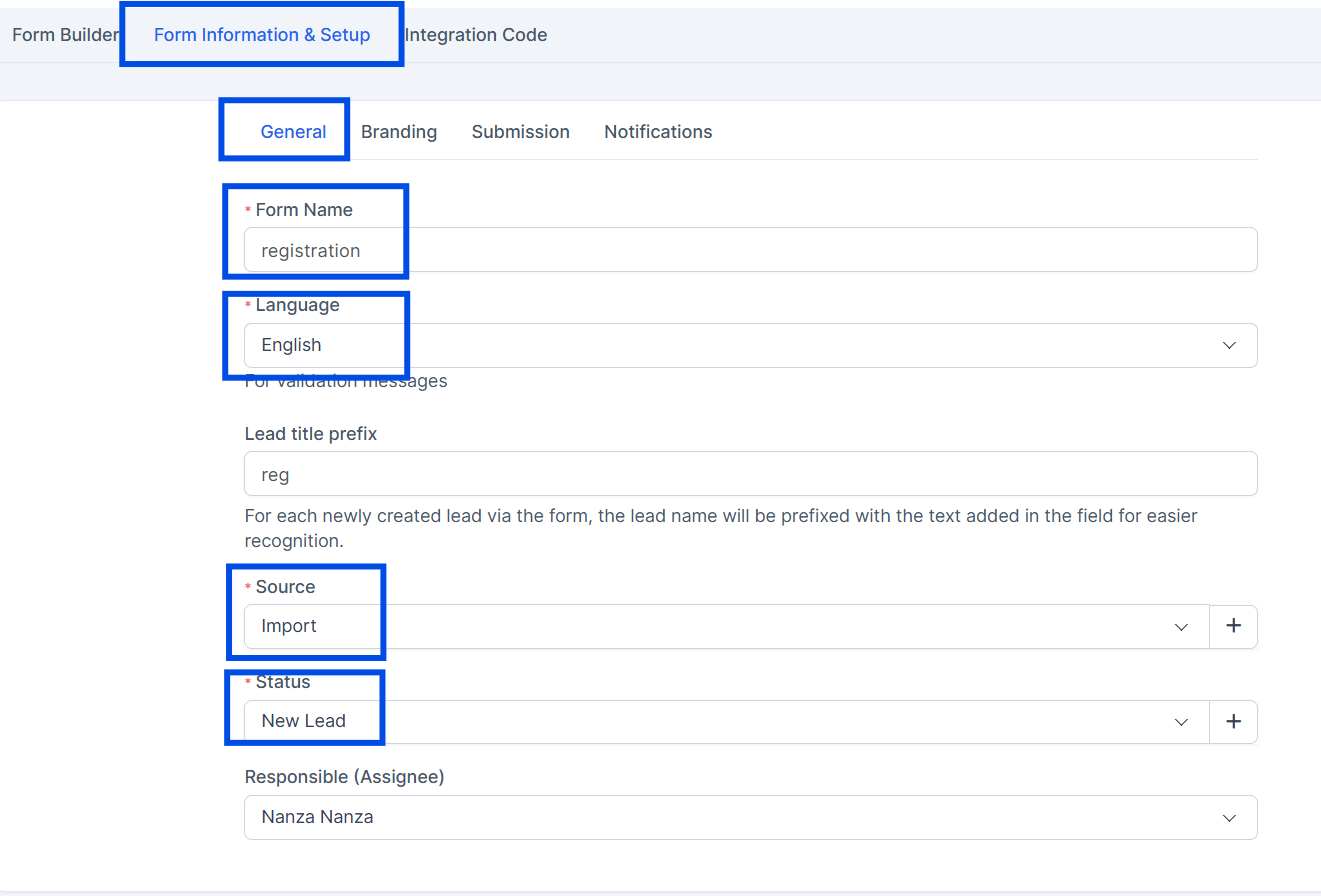
1. To the right of "Form Builder" go to "Form Information & Setup" and inside of it go to "General" inside of it be sure to fill in the mandatory fields marked with a red asterisk *.
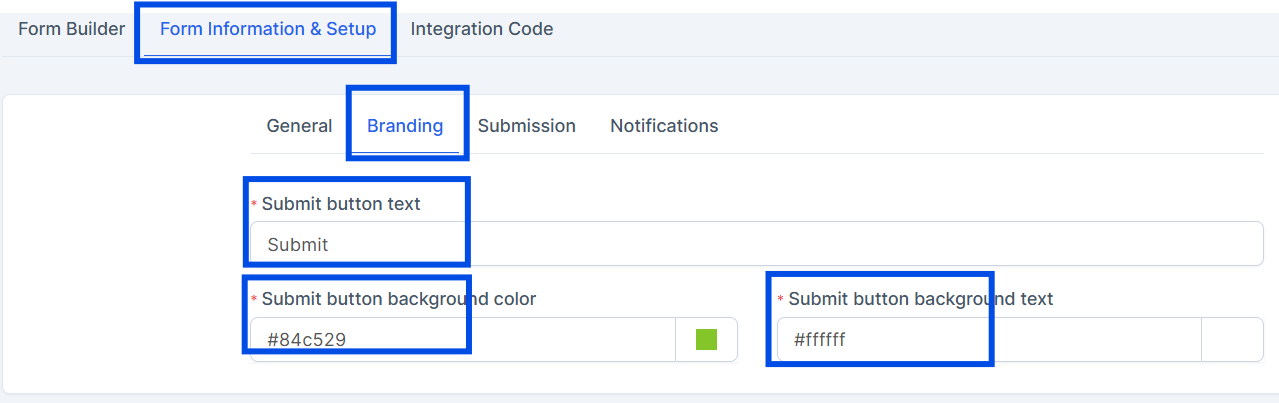
2. After, to the right of "General", go to "Branding". Once again be sure to fill in the mandatory fields marked with a red asterisk *.
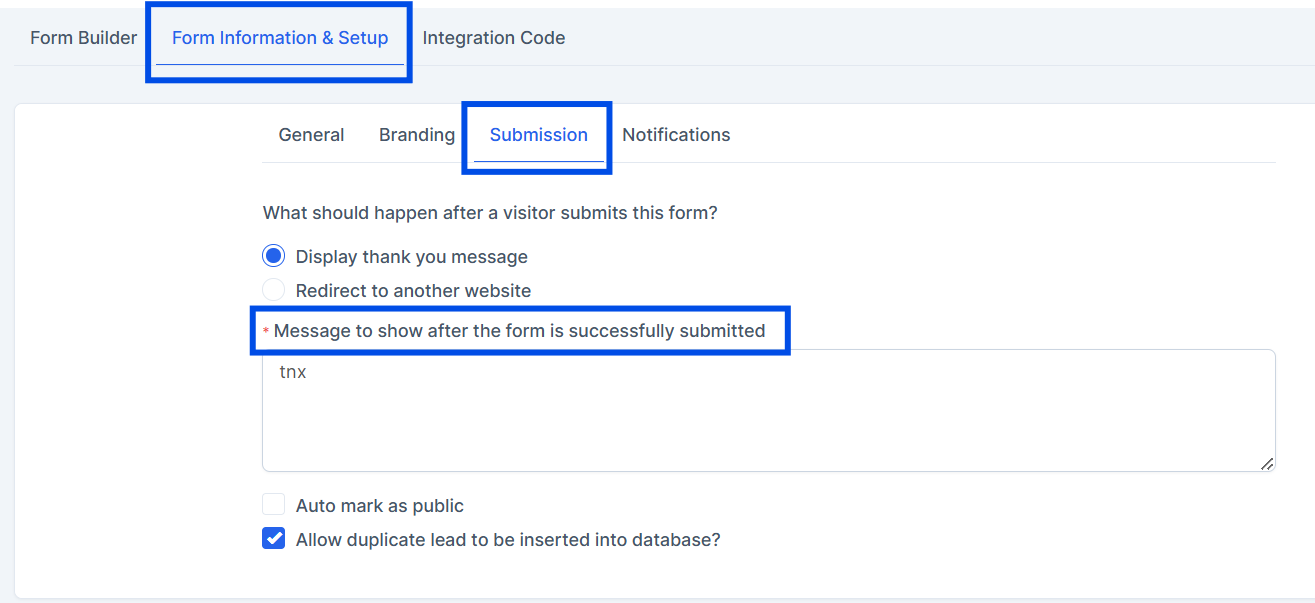
3. After, to the right of "Branding", go to "Submission". Once again be sure to fill in the mandatory fields marked with a red asterisk *.
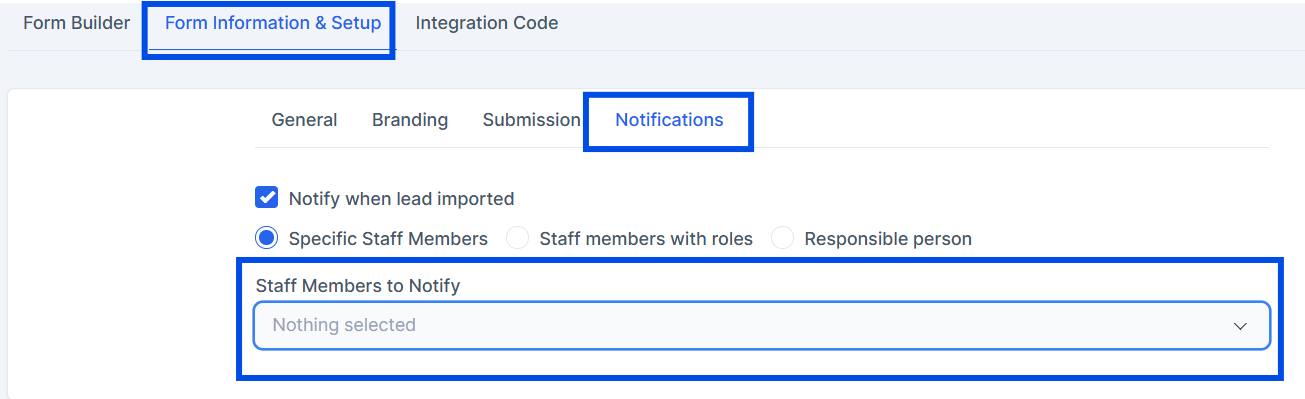
4. Finally, to the right of "Submission", go to "Notifications" you can turn on/off notifications to your liking and choose a staff member if needed.
5. After filling the fields press "Submit" to save your changes.

Integration Code
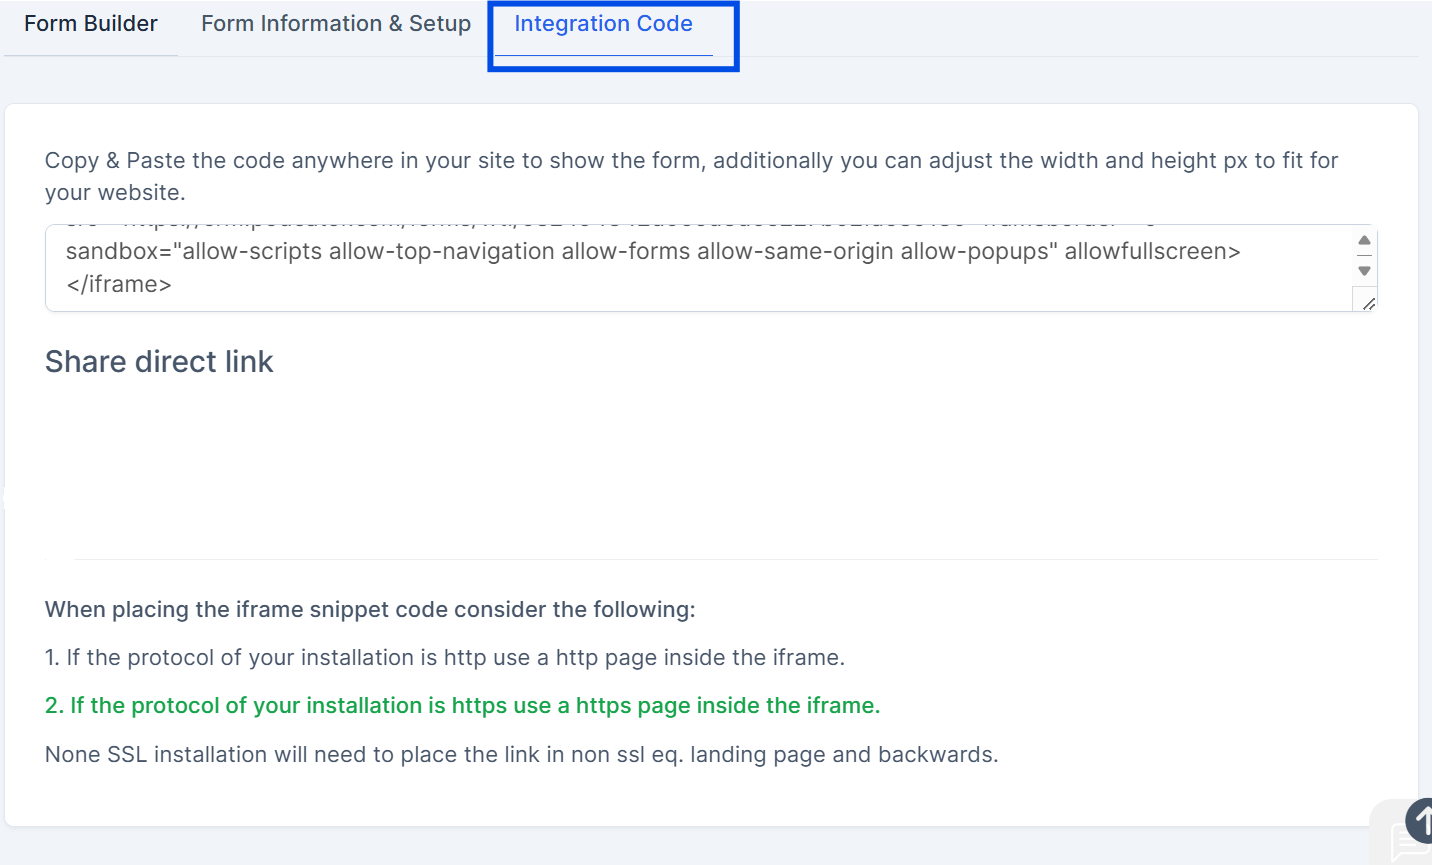
1. To the right of "Form Information & Setup", go to "Integration Code" and inside it, insert your link in the "INSERT LINK HERE FIELD".
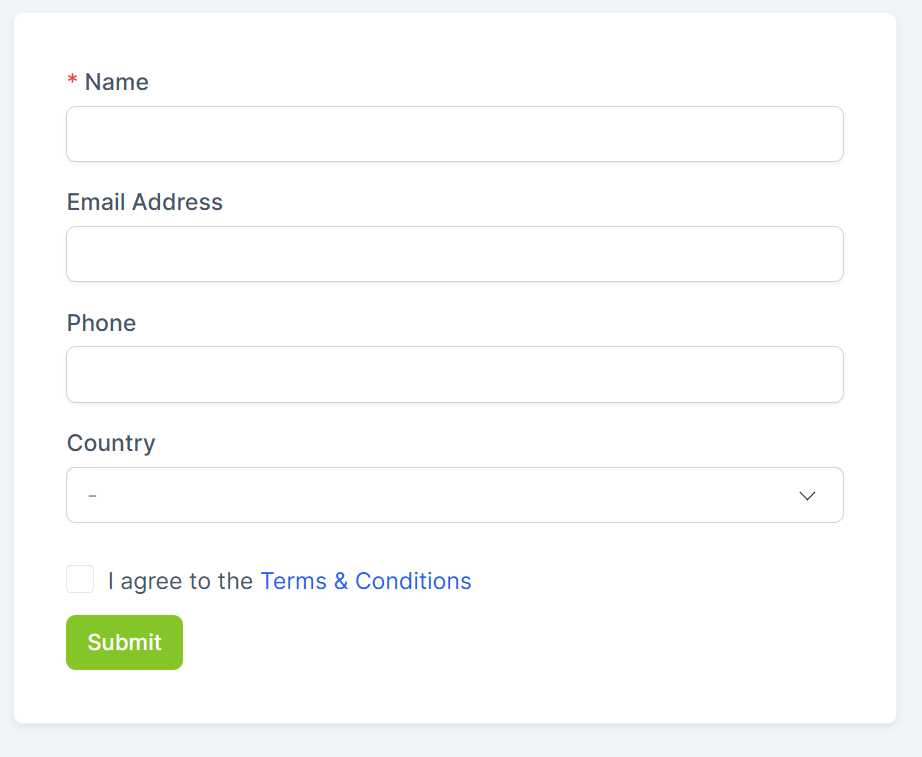
2. As a result, your created form on the website will look like this.